In this tab, the user can attach the old and new files of the patient. The files include any lab, radiology, or tests taken by the patient.
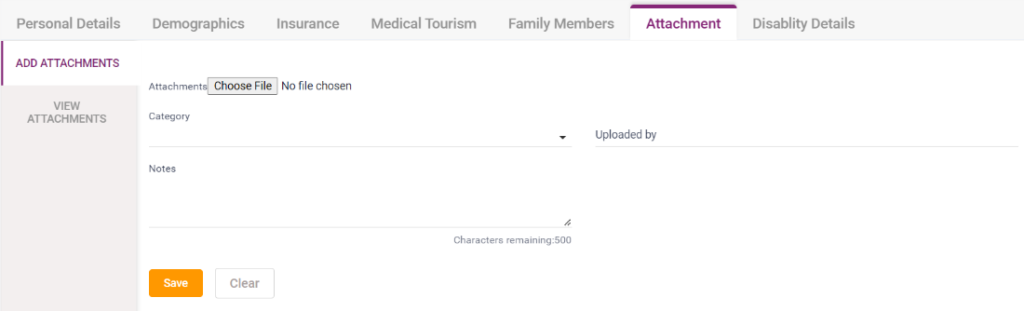
1) Add attachments:
- Attachments: Click on the “Choose File” button, and a pop-up box opens to select the file present in the user’s Device.
- Choose file button: After selecting the file to upload, the file’s name will be shown next to the Choose file button. The “No File Chosen” text will be displayed if not selected.
- Category: Select the category of the file selected from the drop-down list.
- Uploaded By: Enter the Name of the user who uploaded the file.
- Notes: Enter any additional notes if needed.
- Save button: Select the “Save” button after entering the details above. After saving, the details will be moved to the “View Attachments” tab.
- Clear button: Select the “Clear” button to delete the entered details.
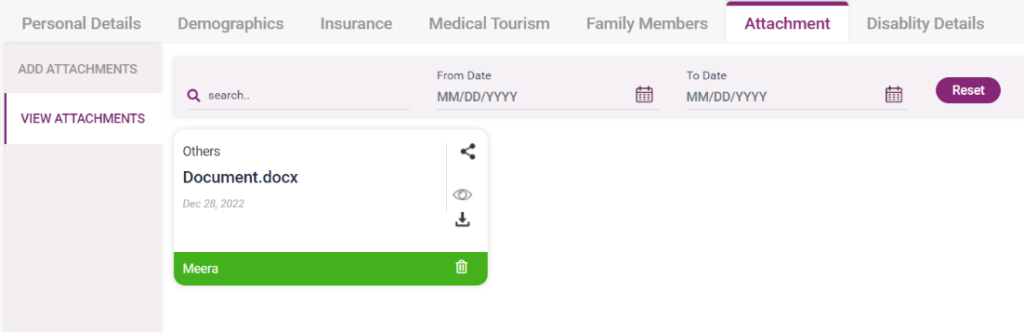
2)View Attachments:
- Already added attachments will be displayed on this screen.
- Search: Enter the Name of the file to be searched, and the searched file will be displayed.
- From Date: Select the date from which the files must be searched.
- To Date: Select the date to which the files must be searched.
- The files within the two dates will be displayed upon selecting the from date and to date.
- Reset: Upon selecting the entered search criteria will be cleared.
- Share: Upon selecting the share button, two options, Mail and message to share the file, will be available.
- View: Upon selecting “View,” the file uploaded can be viewed.
- Download: The uploaded file can be downloaded upon clicking the “Download” button.
- Delete: Upon selecting the “Delete” button, the file uploaded will be deleted.
3.9. Attachments- Add an attachment
3.10. Attachments- View the attachment