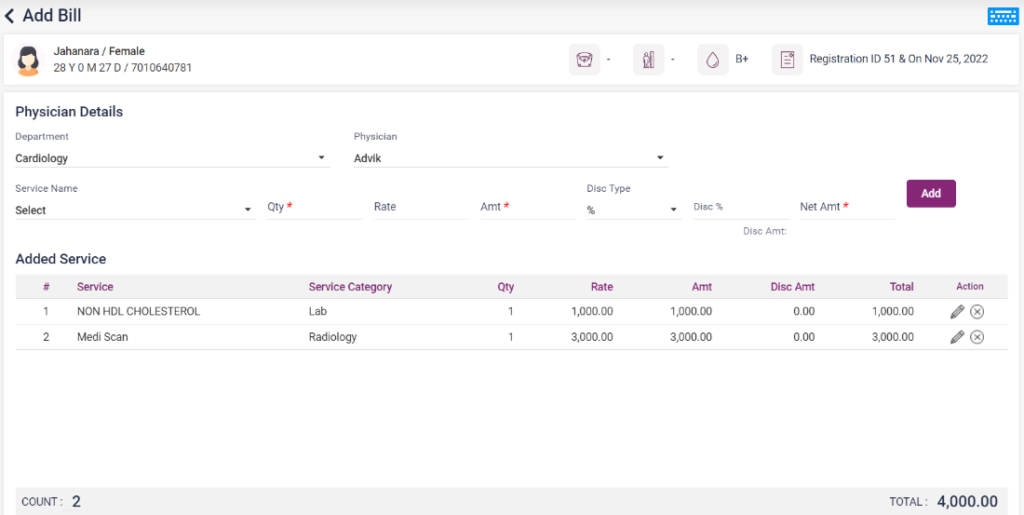
On clicking the service option under the “Action” icon of a particular patient, it navigates to the “Add Bill” page, where the user can add services to the patient and generate a paid bill.
- Department: Under “Physician Details,” select “Department” from the drop-down list.
- Physician: Select the Physician of that department selected from the drop-down list.
- Service Name: Select the Service from the Service Name drop-down list.
- After selecting the service name, “Qty”, “Rate” and “Amount” will be automatically loaded from the details given in the Service Master.
- Discounts can be given for the individual services added in the “Disc Type” field. Two methods can give discount types,
1. “%” – By selecting the % from the disc type, the user can enter a particular percentage discount for the service added. The number must be entered in the “Disc%” field. After entering, the amount of the percentage given will be automatically calculated and displayed as a small preview under the “Disc%” field. And the final amount of the service after the discount will be shown in the “Net Amt” field.
2. “Amt”– By selecting the Amt from the disc type, the user can enter a particular discount amount for the service added. The amount must be entered in the “Disc Amt” field. After entering the discount amount, the final amount of the service added after the discount will be automatically calculated and displayed in the “Net Amt” field.
- Add: After selecting the fields above, click on the “Add” button.
- The added services will be displayed as a list below on the same page.
- The “COUNT” and the “TOTAL AMOUNT” of the services added will be given below the services list.
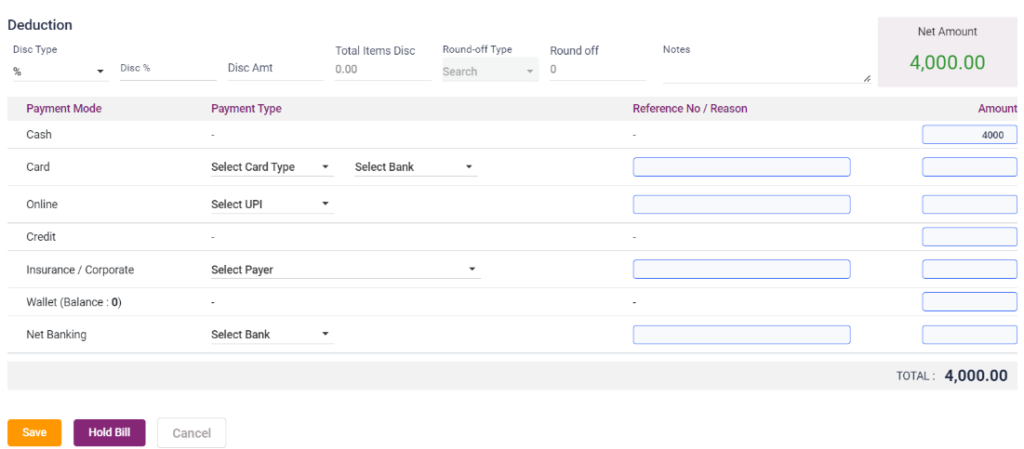
- If the user wants to give an overall discount for the patient, it can be done in the “DEDUCTION” part. The total cost will be automatically calculated and displayed in the “NET AMOUNT” box given by entering the disc type and the discount amount.
- Payment modes: There are numerous payment modes for the patient to pay their bill.
a. Cash– When the payer pays the bill with cash, the amount can be entered next to the cash option.
b. Card- When the payer pays the bill with the card, the Card Type and the bank must be selected from the drop-down list. The reference number should be entered, and the amount must be entered.
c. UPI- When the payer pays the bill via online UPI, the UPI name must be selected, the reference number must be entered, and the amount must be entered.
d. Credit- When the payer wants to pay the bill or a particular amount later, the amount can be entered into the credit and then paid later.
e. Insurance/ Corporate- When the payer wants the amount to be paid by the Insurance or Corporate, then the user can select the Name of the Insurance Payer from the drop-down list, enter the reference number and enter the amount.
f. Wallet- when the payer wants to pay the bill from the available wallet balance of the patient, then the user can enter the amount next to the wallet option. The wallet balance will be shown below. If the bill amount exceeds the wallet balance, then the remaining amount can be paid via other payment modes.
g. Net Banking- When the payer wants to pay the bill through net banking then the user must select the bank, enter the reference number and then enter the amount
The payer can pay the bill by using one or more options of the payment modes.
After the steps mentioned above are finished, use one of the options below to continue,
- Save- Upon clicking the “Save” option. Then the bill will be paid and displayed on the screen. This bill will be available in the “OP Bill List” under the “OP Billing” module in the menu.
- Hold Bill- If the payer wants to pay the bill later due to some reason, then the user can select the “Hold Bill” button. Upon clicking the hold bill button, this particular bill will be moved to the “OP Hold Bill List” under the “OP Billing” module in the menu.
- Cancel- If the user does not want to continue with the “Add Bill” page, then the “Cancel” button can be clicked to move to the previous page.
3.2.2. Add Bill- Add Service
3.2.3. Add Bill- Bill Payment