In the dashboard on the top section, the number of new lab orders, the number of waiting-for-result lab orders, the number of checked-out lab orders, and the total number of lab orders for today will be shown. The refresh button is used to refresh the count present as a notification in each list. The lab order queue consists of the following processes,
- New List
- Sample Collected List
- Pending Entries
- Waiting for Approval
- Approved List
- New List-
- The new list in the lab order queue contains the new lab orders which are prescribed for the day. The lab orders from IP, OP, and EHR Case sheet-Investigation will be loaded here. The details of the lab order shown are Bill ID, Physician, Date, Order from, gender/age, name, and edit.
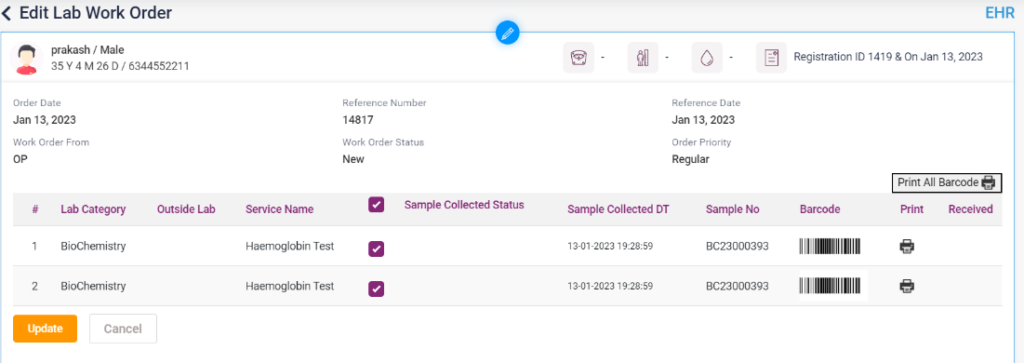
- Click on the Edit icon under Action. Clicking directs to the “Edit Lab work Order” page.
- After collecting the sample from the patient for the prescribed lab test, click on the “Sample collected” check box.
- After the sample collection date, the barcode and sample no will be updated.
- Click on the “Update” button; on clicking, the status of the lab order will be changed to “Sample Collected,” and the particular lab order will move from the New List to the “Sample Collected List” tab.
9.1.1 – Lab- Lab Order Queue- New List
9.1.2 – Lab- Lab Order Queue- New List- Edit Lab Work Order
- Sample Collected List-
- The lab orders can be edited from the sample collected list and acknowledged, and result entry can be done.
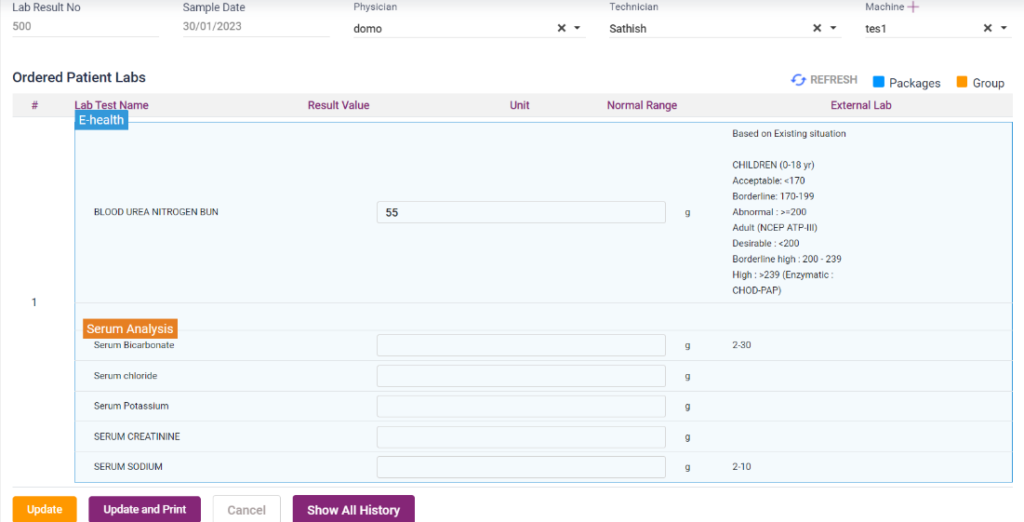
- On clicking the “Add” icon under Action, it directs to the “Lab Result Entry” page. On this page, the result of the lab tests can be entered.
- The lab result no, sample date, physician name, and the machine will be automatically loaded. The user must select the Technician.
- On clicking the “Save” button, the lab order will move to the “Waiting for Approval” tab.
- The result entries are saved by clicking the “Save and Print” button, and the lab test results will be shown on the print page.
- On clicking the “Cancel” button, it will be redirected to the previous page.
- On clicking “Show All History,” the old lab results of the patient will be shown in a pop-up box.
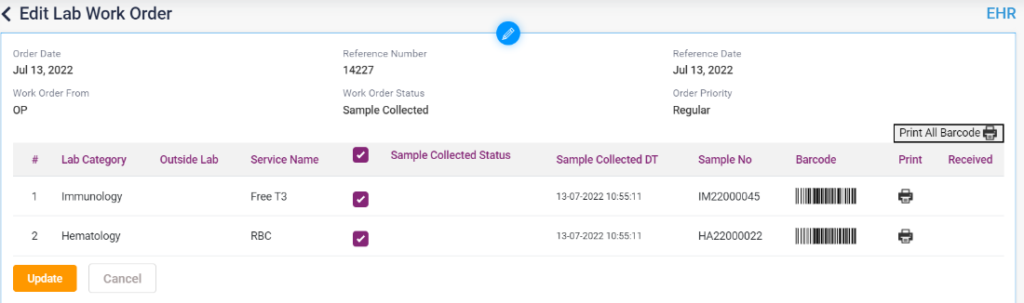
- Click on the “edit” icon in the sample collected list options.
- On clicking edit, it displays the “Edit Lab Work Order” page.
- On that page, the user can select the “Received” check box if the work order has been from the outside lab and received. After that, select the “Update” button.
- Click on the “Acknowledge” button in the sample collected list options.
- On clicking the Acknowledge button, it directs to the “Edit Work List” page.
- On that page, select the “Acknowledge” check box and click the “Update” button.
- Once updated, the acknowledged lab order will be moved to the “Pending Entries” list.
9.1.3 Sample collection page
9.1.4 Sample Collected List

9.1.5 Sample collected list – Acknowledge page

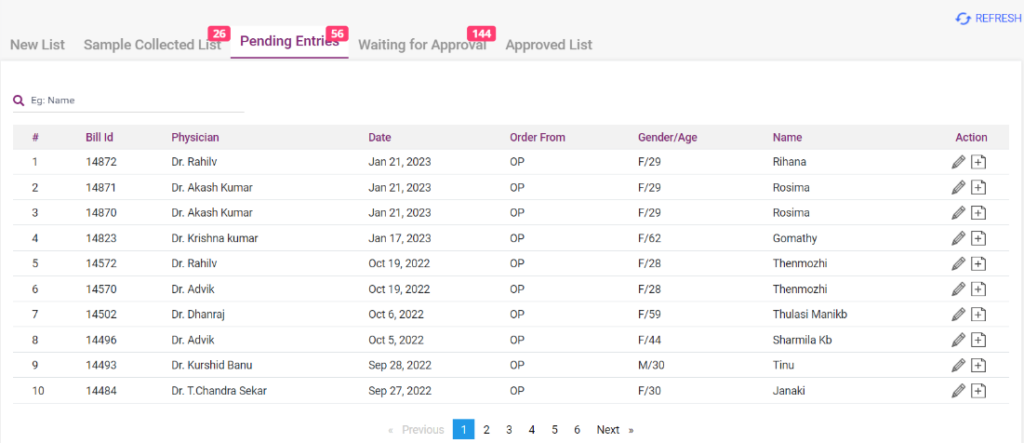
- PENDING ENTRIES LIST
- From the pending entries list, the user can edit the lab order or enter the result by clicking the “Add” icon, which directs to the “Lab Result Entry” page.
9.1.6 Result Entry Page
- Pending Entries List
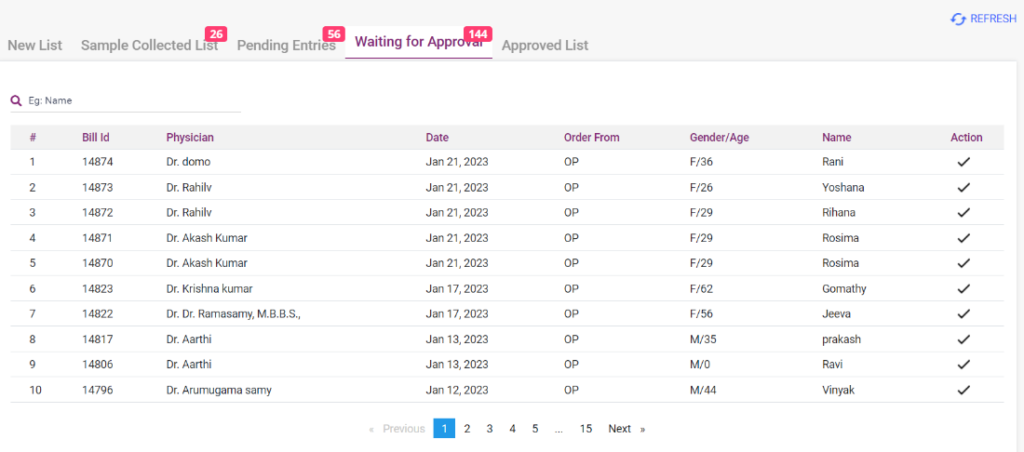
- WAITING FOR APPROVAL LIST
- From the Waiting for Approval List, the lab order can be approved.
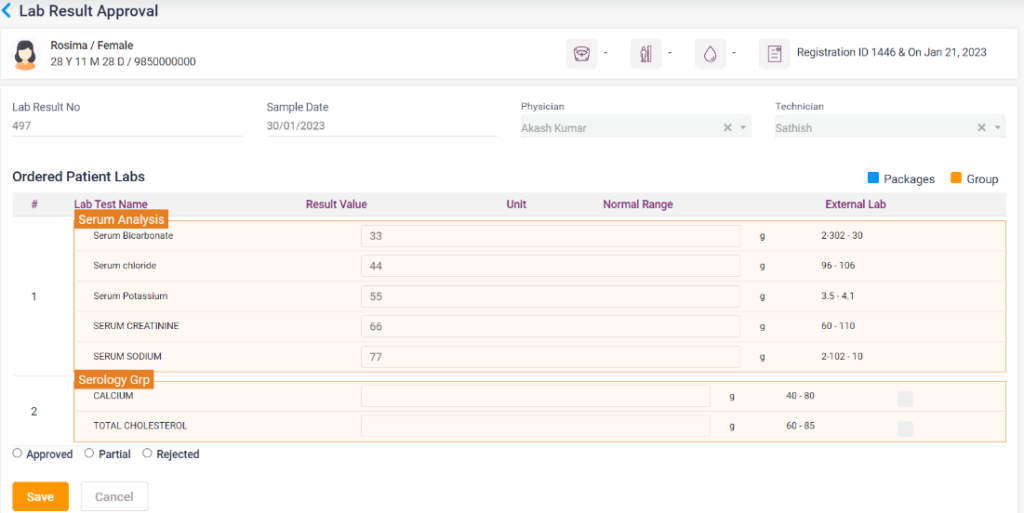
- Click on the “Tick” icon under Actions. On clicking the icon, it directs to the “Lab Result Approval” page.
- All the fields will be automatically loaded on the lab result approval page. The user must select any one of the following radio buttons. “Approved,” “Partial,” and “Rejected.”
- On selecting approval or partial, the lab order will be moved to the “Approved List.”
- On selecting rejected, the lab order will stay on the waiting-for-approval list.
9.1.8 Waiting for approval List
9.1.9 Lab Result Approval page
- APPROVED LIST
- Only the lab orders which are approved will be displayed in this list.
- The user can take a print of the particular lab order from this page.
9.1.10 Approved List