Indent creation is the first step of the tendering process. By the Indent, the department analyzes the need for services/goods and cost estimation. Department user who has the privilege to create a new Indent can create Indent (s) and send it to an authorized person in the department for approval. It has the following steps to be done.
a. Indent Request
b. Indent Approval
c. Indent Issue
d. Indent Receive
- Indent request: An indent is an official order or a requisition for medicine and supplies. The employee acquires the equipment and supplies based on the need, estimation availability and budget. The request can be done from inter branches of the Hospital and inter-departments inside the Hospital.
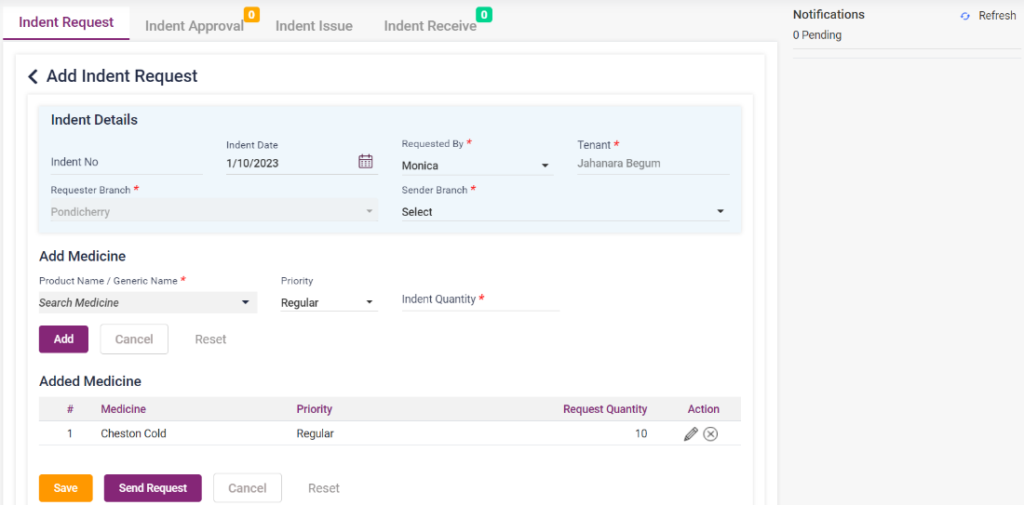
- Click the “Indent Request” button to direct to the “Add Indent Request” page.
- The “Indent No”, “Indent Date”, “Tenant”, and “Requester Branch” will be automatically loaded.
- Select the “Requested By” name from the list and select the “Sender Branch”.
- Product Name/Generic Name: In the “Add Medicine” section, select the medicine or product from the “Search Medicine” field.
- Priority: Select the priority of the medicine.
- Indent Quantity: Enter the quantity of the medicine which is needed.
- Add: Click the add button to add the medicine entered in the list below.
- Cancel and Reset: Click the “Cancel” button to cancel the request and return to the previous page. Click on the “Reset” button to delete the entered details.
- Save: On clicking the save button the request will be saved, and the request status will be set as “New”. The user can edit and make changes to the request and update.
- Send Request: On clicking the send request button, the requested medicine will be sent for approval, and the request status will be changed to “Waiting for approval”.
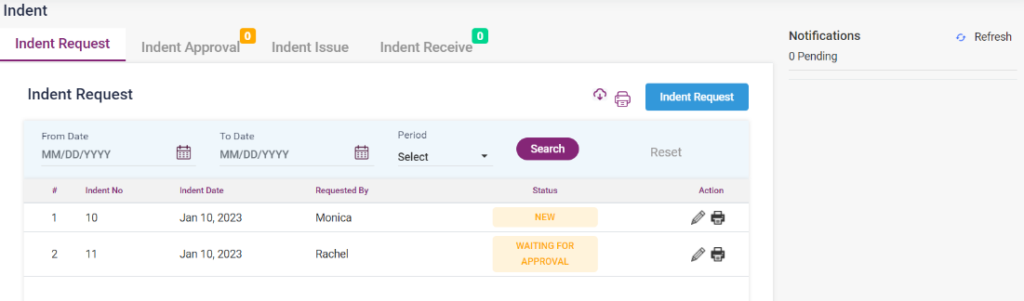
- The requested list will be displayed on the “Indent Request” screen.
- The request can be edited and printed using the “Edit” and “Print” options.
- The Indent Request available can be searched by the from and to date or Period.
Screenshot:
11.1. Pharmacy- Indent- Indent Request-Add Indent Request
11.2. Pharmacy- Indent- Indent Request
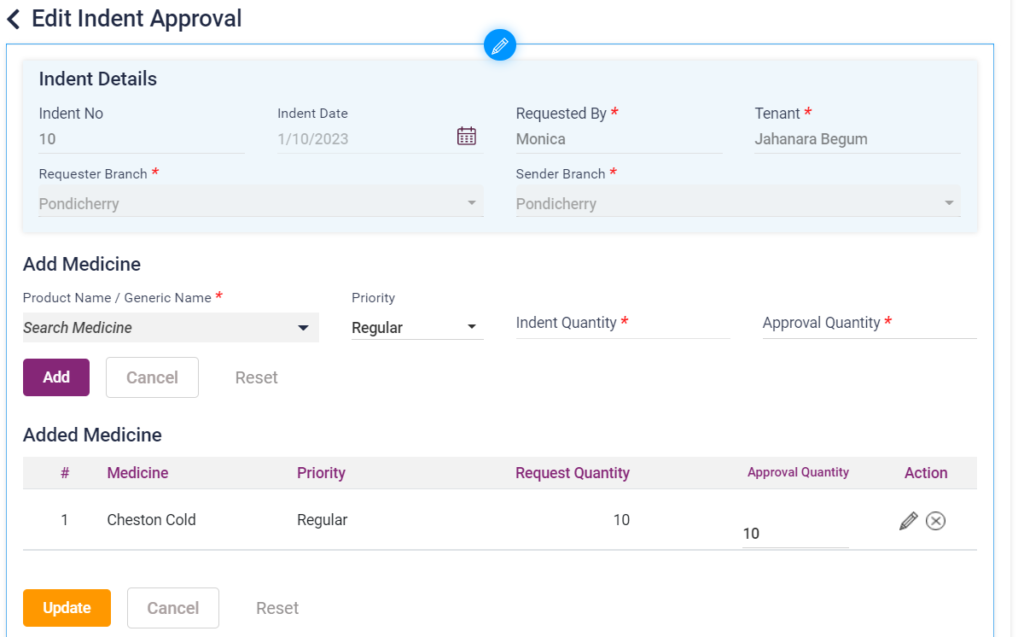
b. Indent Approval: The approval of the Indent requested will be done from the side that will send the requested products. The employees who receive the request approve it according to availability and timing. The approval will be done from the sender branch or the sender department.
- The current request will be shown with a “Go To Approve” button on the right side of the notifications panel. Click on the button to go to the Approval page or select the edit icon of the Indent request.
- The “edit Indent Approval” page will be loaded. The page will automatically be loaded with the available indent details.
- The approver must enter the quantity according to availability and click the “Update” button to Approve the Indent.
- Once approved, the status of the Indent will be changed to “Approved”, and the “Go To Issue” icon will be enabled.
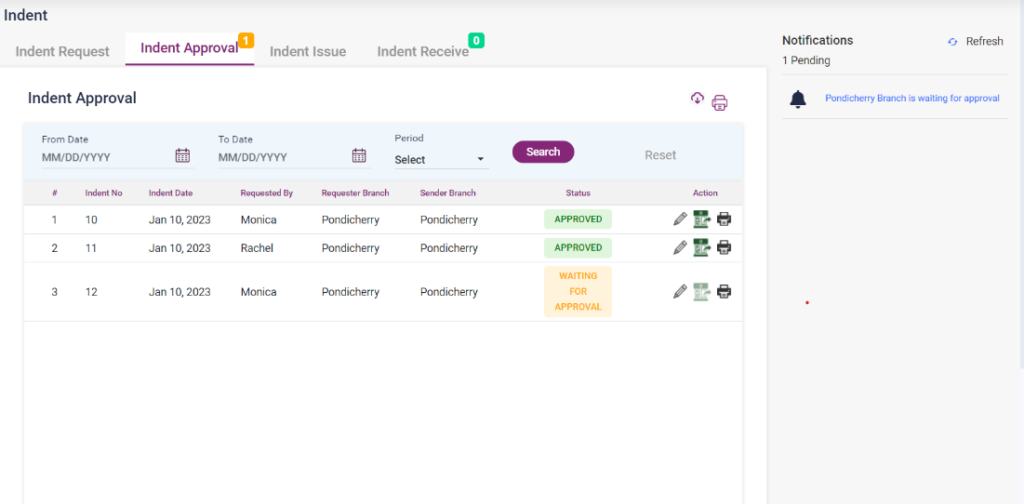
- The approved Indent will be shown as a list in the “Indent Approval” screen.
- Clicking the “Go To Issue” icon from the list or notifications panel leads to the “Indent Issue” page.
- The Indent Approval list available can be searched by the from and to date or Period.
Screenshot:
11.3. Pharmacy- Indent- Indent Approval-Edit page(waiting for approval)
11.4. Pharmacy- Indent- Indent Approval
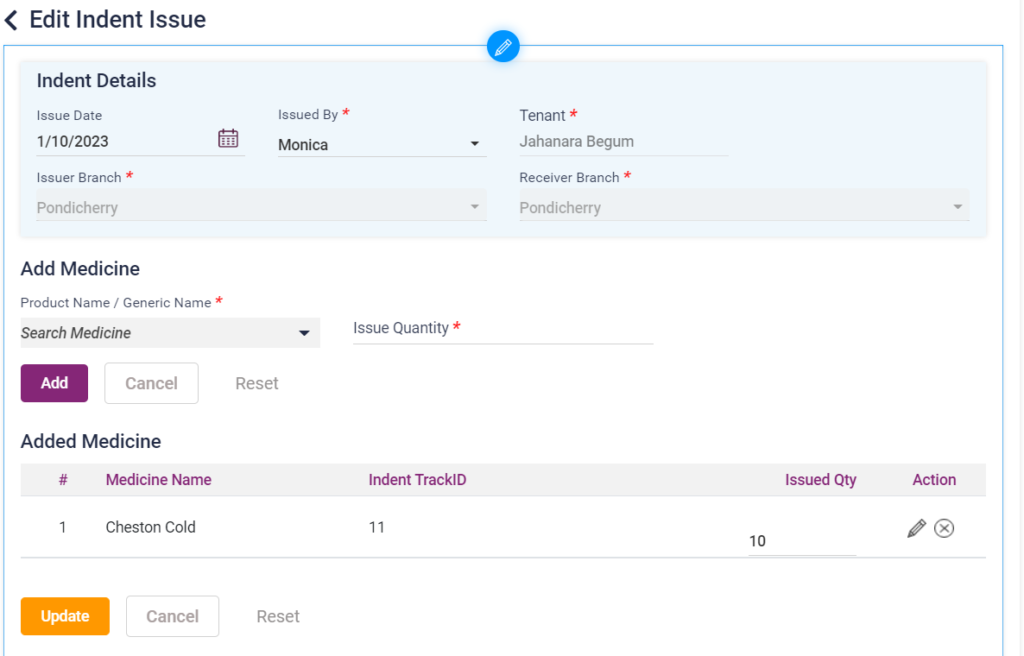
c. Indent Issue: The indent issue will be done by the sender. The product or medicine will be issued from the stock and sent to the requestor.
- Click on the “Go To Issue” icon, the “Add Indent Issue” page will be loaded.
- The issuer will enter the issued quantity on this page according to the available stock.
- After entering the “Issued By” name from the drop-down list, click the “Save” button to complete the Indent Issue.
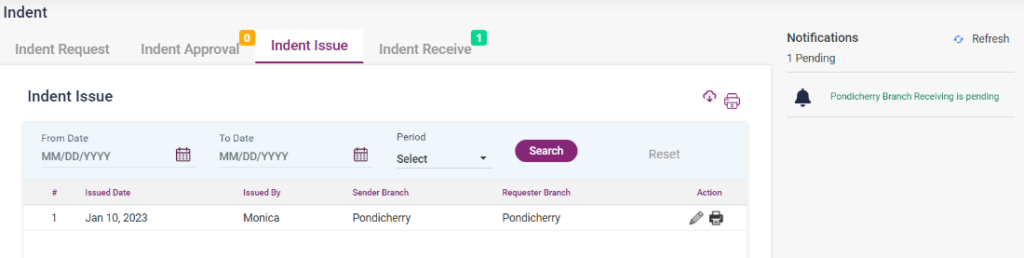
- The Issued entries will be shown in a list in the “Indent Issue” screen. The indent issue list can be edited and printed individually using the available icons.
- The Indent Issue list available can be searched by the from and to date or Period.
Screenshot:
11.5. Pharmacy- Indent- Indent Issue -Edit issue
11.6. Pharmacy- Indent- Indent Issue
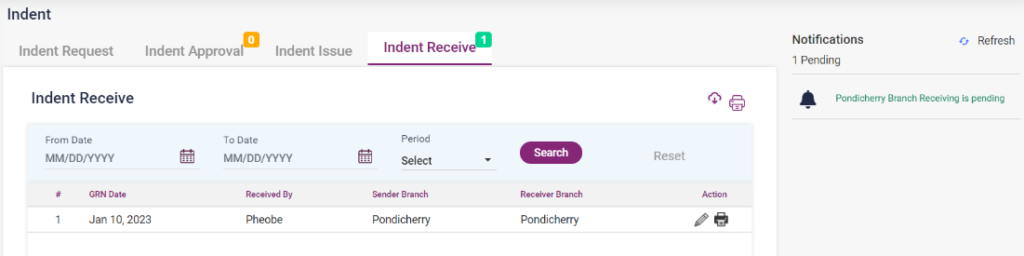
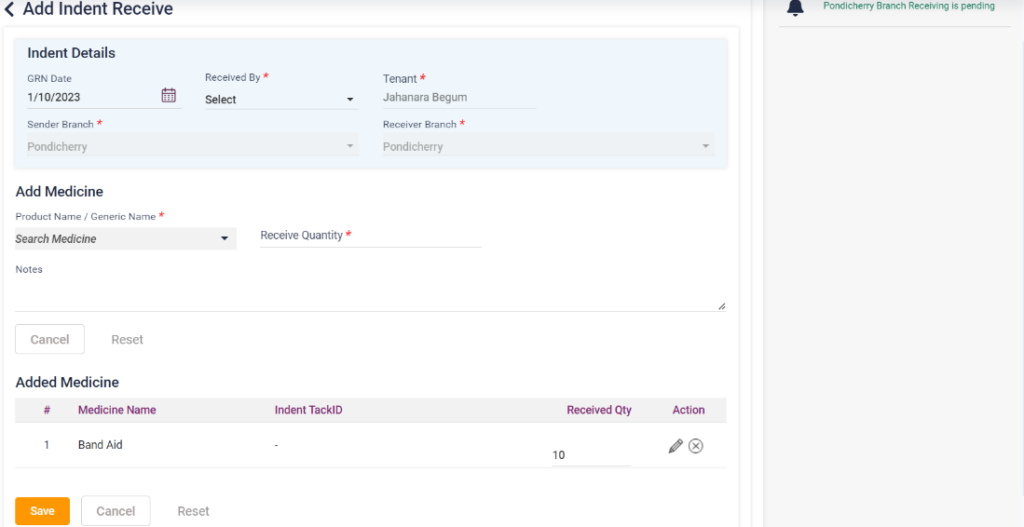
d. Indent Receive: The Indent requested after issuance must be received from the requestor. After receiving the product or medicine will be decreased in the stock list.
- Click on the “Go To Receive” icon in the notifications panel.
- Enter the quantity of the product received in the Received quantity field.
- Other details will be automatically loaded. Select the “Received by” name from the list and click on save to complete the Indent process.
- The Indent Receive list will be shown on the “Indent Receive” screen.
- The Indent Receive list available can be searched by the from and to date or Period.
11.7. Pharmacy-Indent- Indent Receive-Add Indent Receive
11.8. Pharmacy-Indent-Indent Receive