Ezovion token management system, also known as queue management system, is a software to manage crowd / queues efficiently by issuing tokens in customer-facing departments. It reduces wait times for customers and makes service smooth.
First and foremost we have to set up the “OPD Monitor set up” and “OPD Sequence generator” in the MAsters -> Master set up-> Settings.
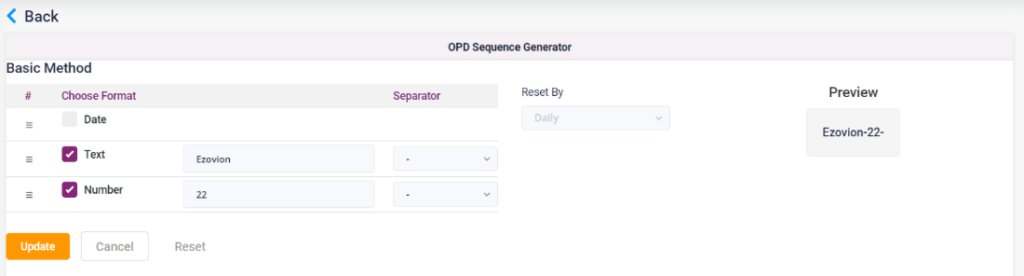
OPD Sequence generator: This set up needs to be configured to generate the token number for the patients.
- First select the template for the OPD token, text, date format and number. According to the selected context type the text, date format and number in the respective fields.
- According to the preview of the token will be displayed in the preview field.
- Click on the Save button to save the settings.
1.1. OPD Sequence Generator
OPD monitor set up: The monitor set up for each doctor or each department can be set up here.
- Click on the “Add monitor” button to add the monitor for different doctors or departments. Enter the code, name, location, idle message and click on “Save”. The added monitors will be displayed in the screen.
- In the monitor screen click on the Monitor and Physician setup, select the doctor name, enter the device ID, room no and click on add. Multiple doctors can be added.
- Display Column setup: Select the fields which needed to be displayed.
- Today’s setup: Click on the today’s setup, select the device Id from the list. Select start, stop or end accordingly.
1.2. OPD Monitor set up

1.3. OPD Monitor set up- Todays set up

1.4. OPD Monitor set up- Display column set up

1.5. OPD Monitor set up – Add Monitor

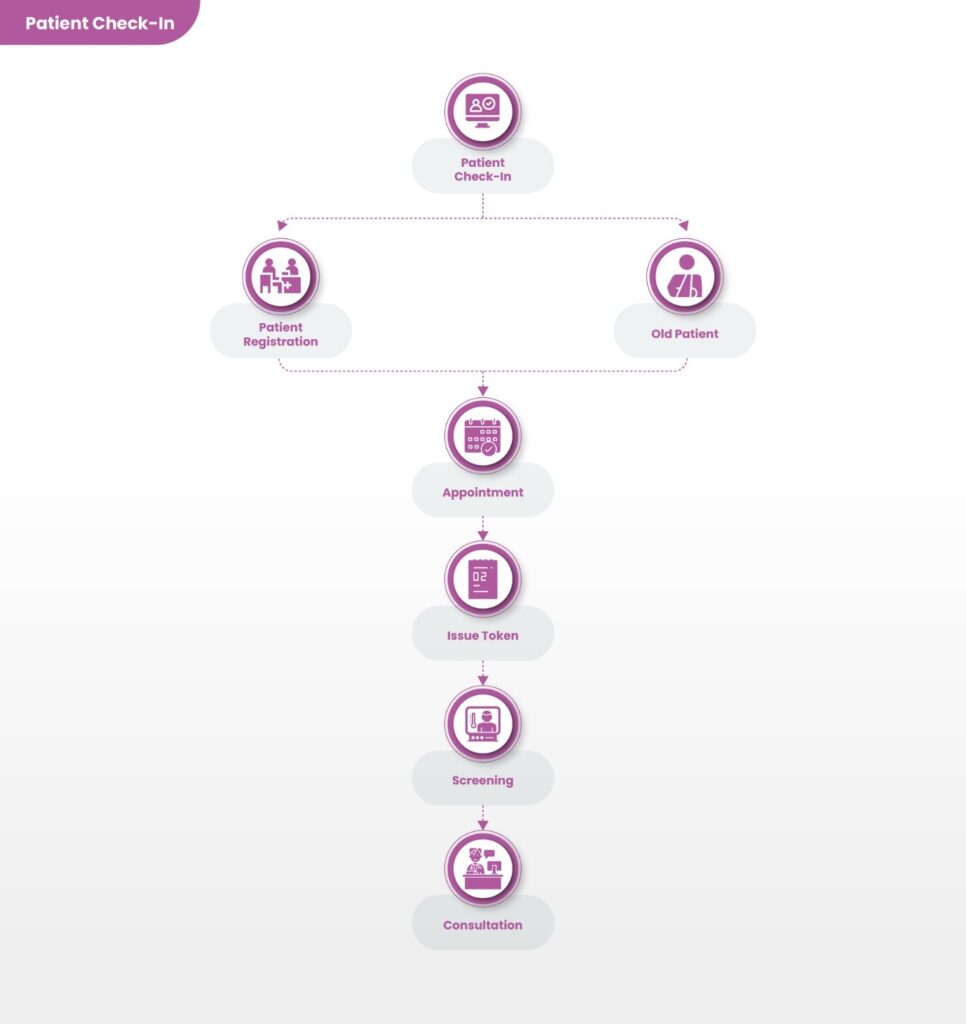
After setting up the masters, the token generator works in the following pages, if the doctor uses or changes the status of the patient it will get updated automatically to the appointment page. If the receptionist uses or changes the status in the appointment page, then it gets updated in the doctor dashboard page.
- Appointment page:
- Once the patient is checked in it will be updated on the appointment page.
- Once checked in the status will be changed to “Waiting”. After this the token number will be generated.
- If the doctor is ready to call the patient, click on the “call” button. Upon clicking, “start serving” button will be available. Click on the start serving button, then the queue status will be changed to “Serving”. This will also be updated on the appointment queue page.
- After consultation is over, click on the “End” button. The queue status will be changed to “serving ended”.
- If a patient must be consulted immediately, then the person can click on the “Urgent” button and follow the same process.
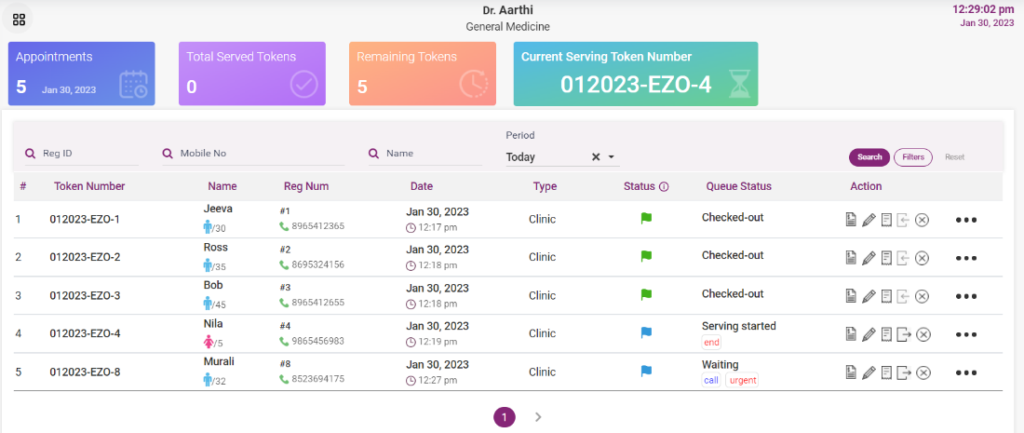
- Doctor Dashboard
- The doctor can check in the patient by clicking the check in icon in the doctor list-> doctor dashboard icon.
- Once checked in the status will be changed to “Waiting”. After this the token number will be generated.
- If the doctor is ready to call the patient, he can click on the “call” button. Upon clicking, “start serving” button will be available. Click on the start serving button, then the queue status will be changed to “Serving”. This will also be updated on the appointment queue page.
- After consultation is over, click on the “End” button. The queue status will be changed to “serving ended”.
- If a patient must be consulted immediately, then the doctor can click on the “Urgent” button and follow the same process.
1.6. Doctor Dashboard
1.7. Appointment dashboard

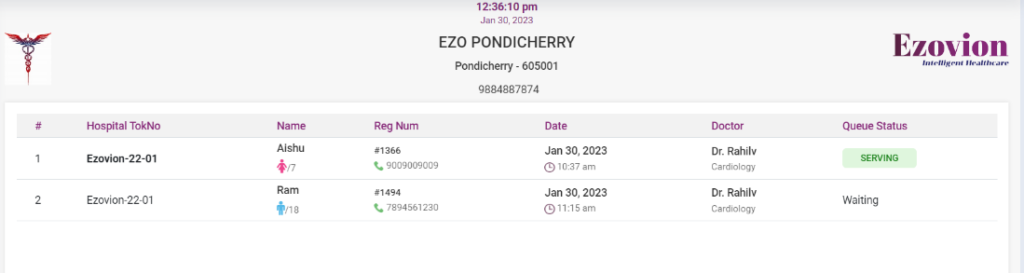
- Appointment Queue
- When the doctor starts serving the patients, then the name of the patient, the doctor name and the status “Serving” for that patient will be displayed in a list here.
- Once service is ended then that name disappears from the list.
1.8. Appointment Queue page