- This page has a list of doctors available in all the departments of the hospital.
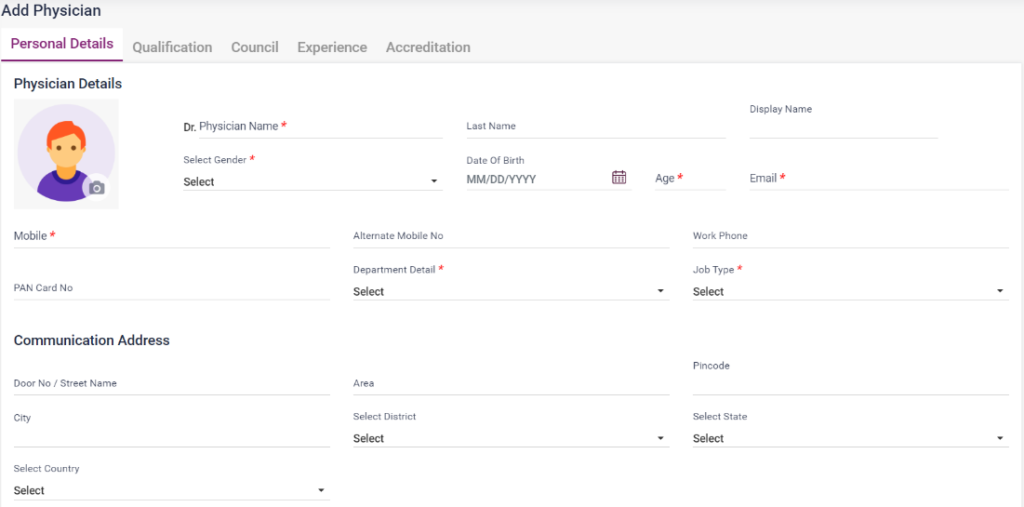
- New doctors can be added using the “Add Physician” button.
- Fill in the physician’s personal details, Qualifications, Council, Council, Experience, and Accreditation details.
- Click on the edit icon to edit the entered details of the physician.
- Click on the schedule icon. On this page, the user can schedule the consultation timing of the doctor. Click on the “Add Schedule” button. Fill in the date, time slot, days, branch, and timings of the doctor’s availability and click on the save button. Under Ad-hoc availability, enter the timings of the doctor. Under leave, enter the leave details of the doctor by clicking the “Add Leave” button.
- Click on the patient appointments icon to see the appointments booked for the doctor.
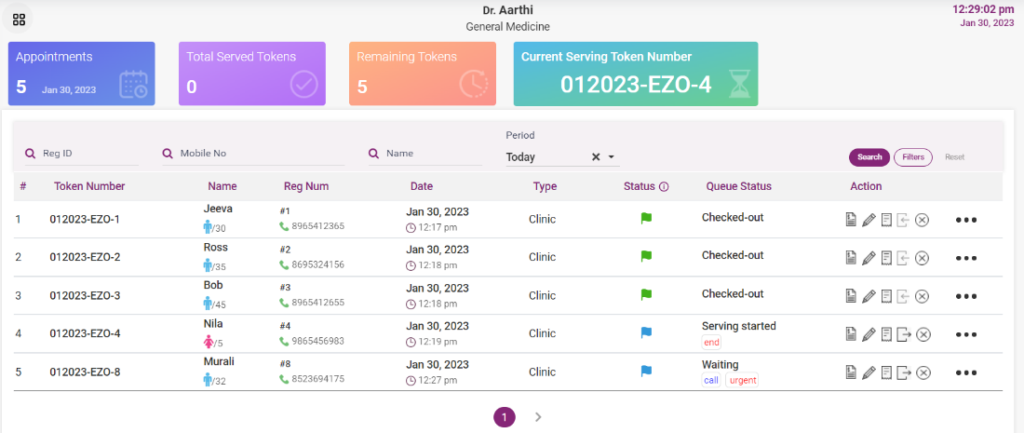
- Click on the doctor dashboard. Today’s appointments will be shown on the screen.
- Token Management
- Once the patient is checked in, it will get updated or the doctor can check in the patient by clicking the check-in icon. Once checked in, the status will be changed to “Waiting.” After this, the token number will be generated.
- If the doctor is ready to call the patient, click the “call” button. Upon clicking, the “start serving” button will be available. Click on the start serving button, and the queue status will change to “Serving.” This will also be updated on the appointment queue page.
- After the consultation is over, click on the “End” button. The queue status will be changed to “serving ended.”
- If a patient has to be consulted immediately, the doctor can click on the “Urgent” button and follow the same process.
4.1.1-Doctor List

4.1.2- Doctor List- Add Physician
4.1.3- Doctor List-Schedule

4.1.4- Doctor dashboard