1.Master set up
In order to use the various modules in Ezovion HMS the master set up section has to be filled in.
- SETTINGS
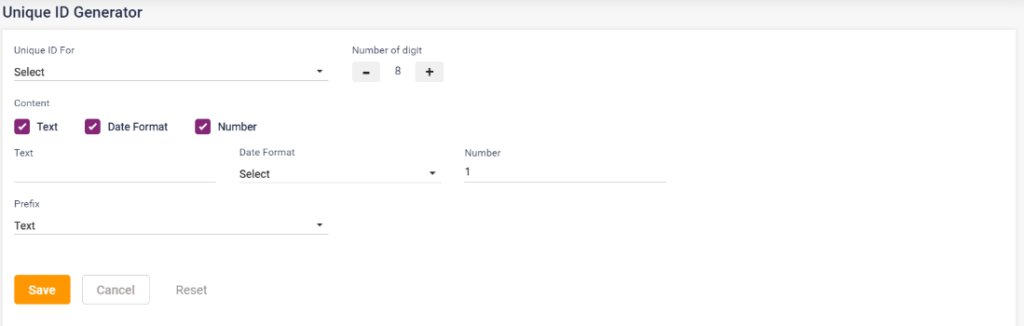
- Unique ID generator: To generate the UHID for the patient this set up must be configured.
- Unique ID for: select the page you want to set the UHID for.
- Number of digits: Select the number of digits.
- Content: The select the template for the ID text, date format and number. According to the selected context type the text, date format and number in the respective fields.
- Prefix: Set the prefix.
- Click on Save to save the ID, Cancel or reset to cancel the settings or clear the entered texts.
- Same steps to be followed to set up the UHID for other pages.
1.1. Unique ID generator
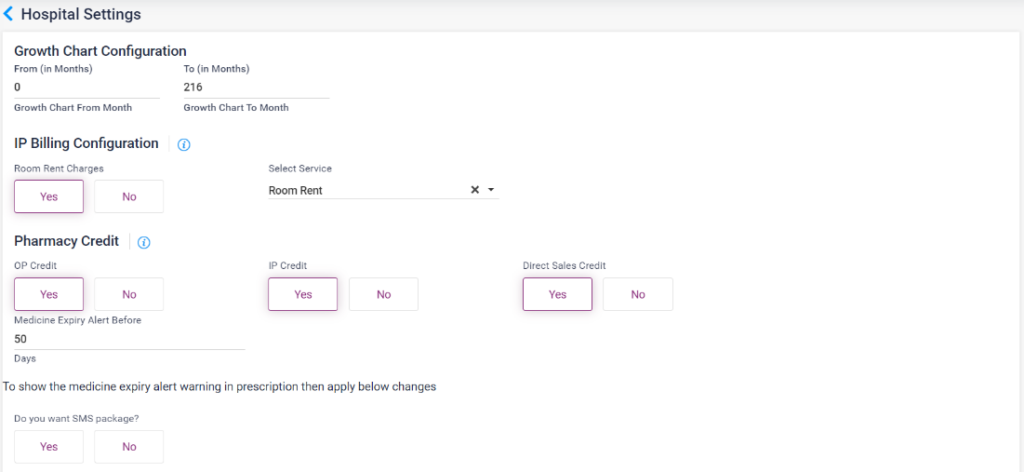
- Hospital settings: The common settings for growth chart, IP Billing configuration, Pharmacy credit, lab and ward wise price.
- Growth Chart Configuration: Select the from to months for which the growth chart must be loaded.
- IP Billing Configuration: Add room rent service in the service master and load that room rent in the service drop down list and select “Yes” only then the “Sent to Billing” button will be visible in the IP billing section.
- Pharmacy Credit: Select yes or no for the OP, IP, Sales bills credit bills.
- Medicine Expiry Alert before: Select the number of days before which you need an alert for Expiry of the medicines.
- SMS package: Select yes or no to activate or deactivate the SMS package.
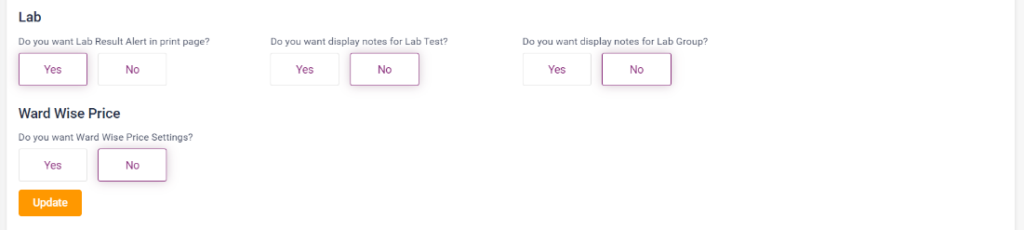
- LAB- lab result alert in print page: Select yes to get the result alert in the print page of the lab test.
- Display notes in lab test: select yes to display the notes field in the lab test service page.
- Display notes in lab group: select yes to display the notes field in the lab test service page.
- Ward wise price settings: Select yes to show the ward wise price details.
1.2. Hospital Settings
- Printer settings: The print page settings for the bills under each module can be set up here.
- Click on the Master->Master set up-> Settings-> Printer settings-> Add Printer settings button
- In the “Add Printer settings” page, select the page from the “page setup for” drop down box.
- Select the paper size, orientation and enter the page margin size. Click on the “Generate Printer page” settings.
- It directs to the “Print settings”. The user can add the following fields,
- Header Logo: Select the checkbox, the alignment of the header, and the template.
- Header Logo 2: Select the checkbox, the alignment of the header, and the template.
- Hospital Details: Select the check box, alignment, enter the hospital name, hospital location and contact details.
- Page Title: Select the alignment and enter the page title.
- Table Title: Select the alignment and enter the table title.
- Reg ID Barcode: Select the checkbox to display the barcode.
- Signature details: Select the alignment, click on the image checkbox or “Add” button to enter the digital signature and click on save to add the signature. Click on change to change the sign or remove to remove the added sign.
- Footer Logo: Select the checkbox, alignment, and template.
- Footer Logo 2: Select the checkbox, alignment, and template.
- Footer details: Select the checkbox, enter the hospital name, hospital location and contact details.
- Then click on the save button. The settings can be edited from using the edit icon.
1.3. Printer Settings
- Unit: The unit measurement for medicines or patient food intake has to be set up here.
- Click on the “Add Unit”.
- Unit code: Enter the unit code for the unit
- Unit name: Enter the unit name.
- Is Active: Select the Is active check box for showing the unit in the modules. If you uncheck this unit will not be available in the list.
- Save: Click on save to save the entered details.
- The units added will be displayed in a list. The units added can be edited using the edit option under actions.
1.4. Unit Master- Add unit

- Mandatory settings: The mandatory field settings i.e., the mandatory fields for the registration page, IP admission page and doctor registration page can be set up here.
- Page: Select the page to set up the fields.
- Mandatory Fields: Select the fields which you want to set mandatory in the list. Selected fields will be displayed in the mandatory fields text field.
- Click on Save to save the settings.
1.5. Mandatory setting

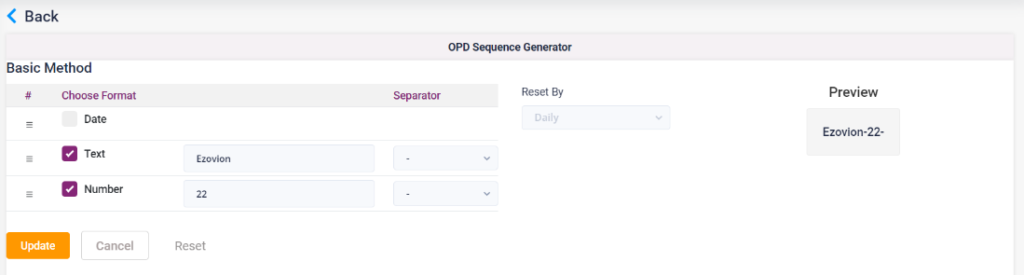
- OPD Sequence generator: This set up needs to be configured to generate the token number for the patients.
- The select the template for the OPD token, text, date format and number. According to the selected context type the text, date format and number in the respective fields.
- According to the preview of the token will be displayed in the preview field.
- Click on the Save button to save the settings.
1.6. OPD Sequence Generator
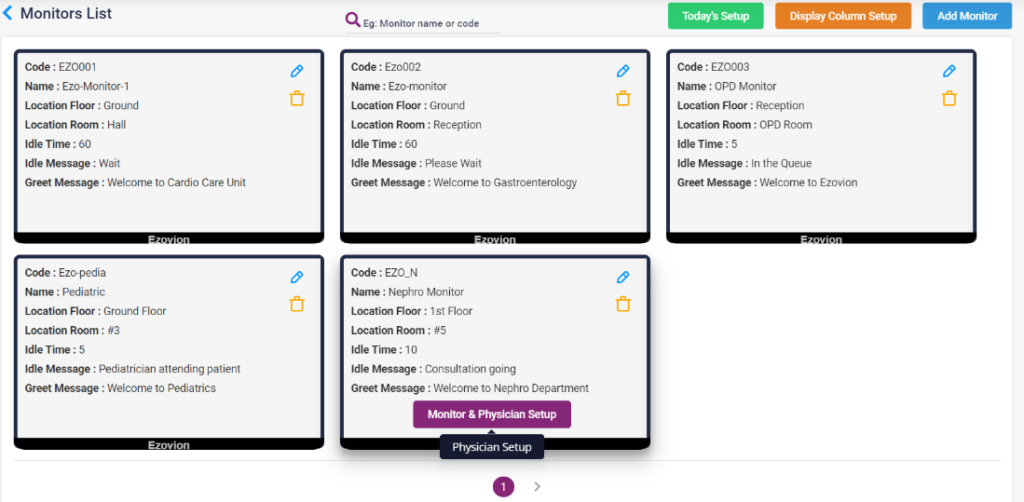
- OPD monitor set up: The monitor set up for each doctor or each department can be set up here.
- Click on the “Add monitor” button to add the monitor for different doctors or departments. Enter the code, name, location, idle message and click on “Save”. The added monitors will be displayed in the screen.
- In the monitor screen click on the Monitor and Physician setup, select the doctor name, enter the device ID, room no and click on add. Multiple doctors can be added.
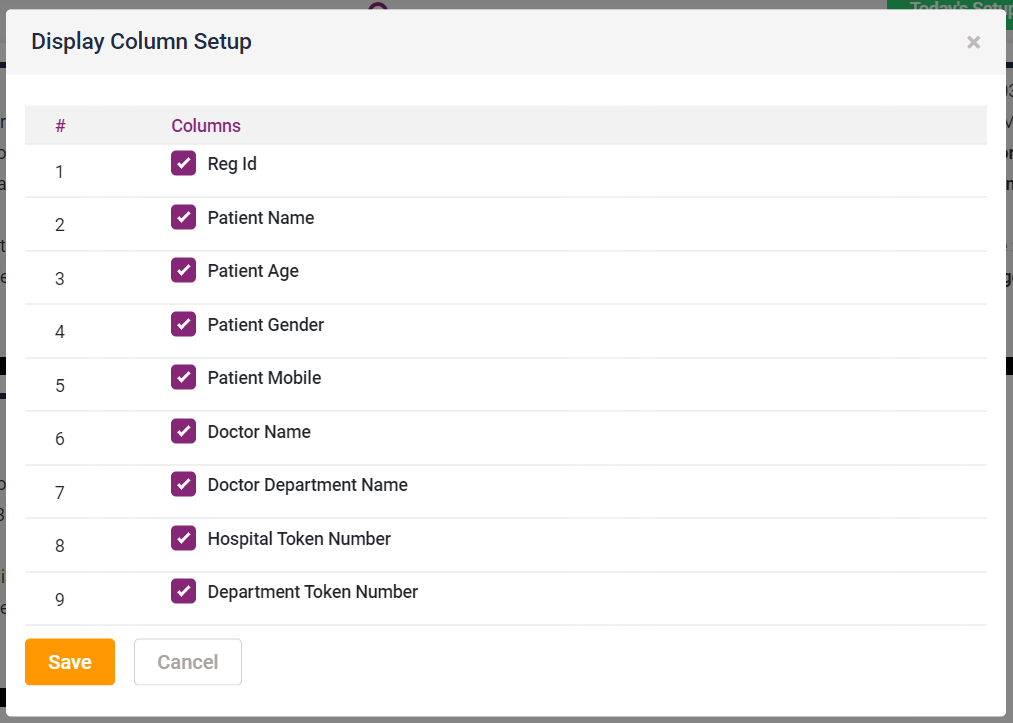
- Display Column setup: Select the fields which needed to be displayed.
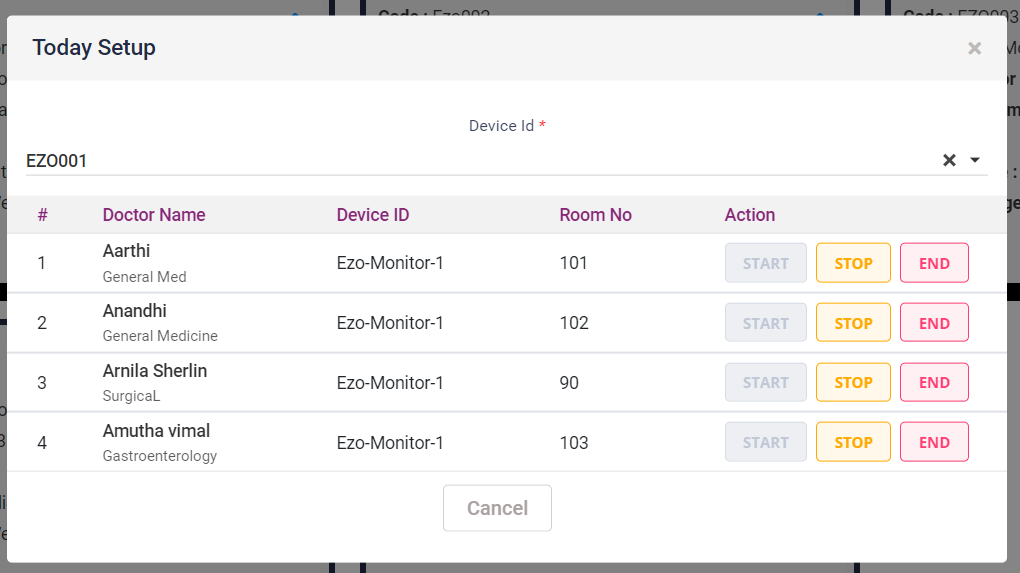
- Today’s setup: Click on the today’s setup, select the device Id from the list. Select start, stop or end accordingly.
1.7. OPD Monitor set up
1.8. OPD Monitor set up- Todays set up
1.9. OPD Monitor set up- Display column set up
1.10. OPD Monitor set up – Add Monitor
- MY HOSPITAL
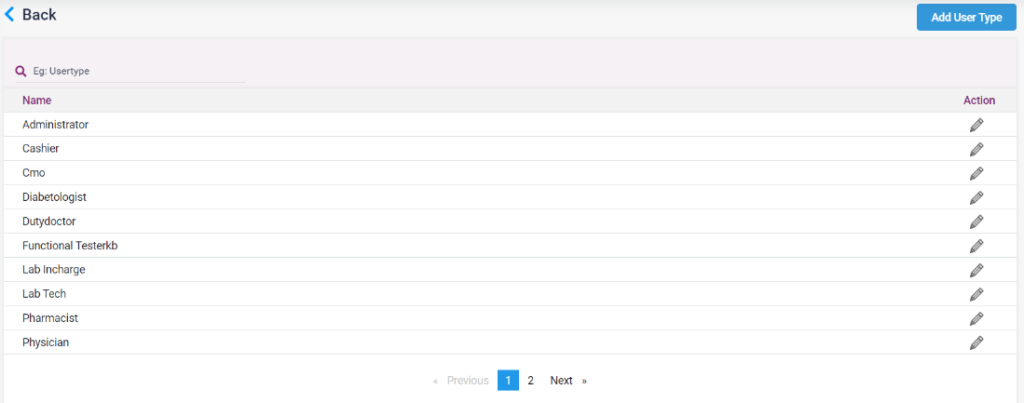
- User type: The different users from different departments who use the Ezovion HMS can be added here.
- Click on the “Add User” button.
- Enter the user type for example, pharmacist, physician, lab technician etc.
- Click on “Save” button. The added user type can be edited using the edit icon.
1.11. User type- Add user type
1.12. User type list
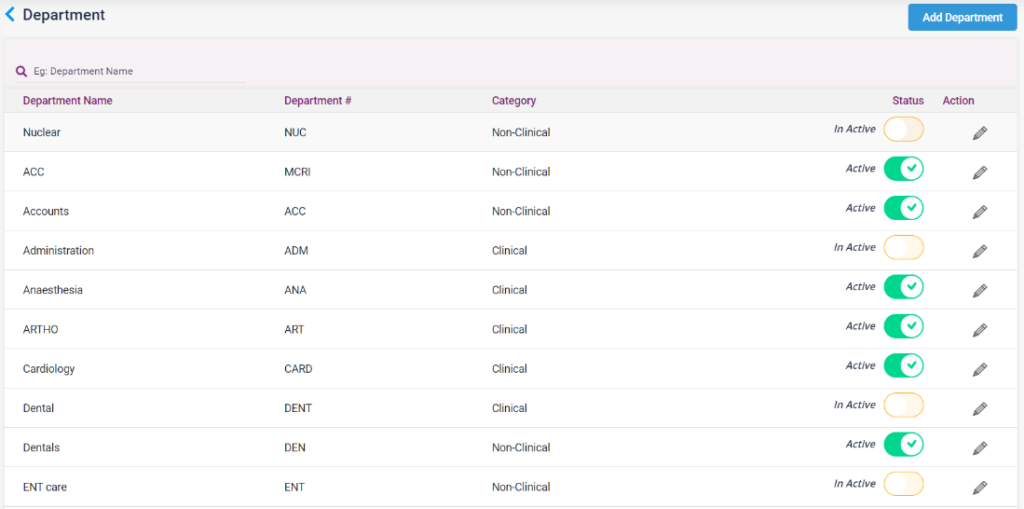
- Department: The various departments inside the hospital can be uploaded here.
- Click on the “Add Department” button.
- Enter the various department name present inside the hospital.
- Select the “Is Clinical” check box if the department is a clinical department.
- Click on “Save” button. The added departments can be edited using the edit icon.
1.13. Department List
1.14. Add department

- Shift Times: The shift times when the doctors and the nurses enter can be set up here.
- Click on the “Add Shift Times”.
- Enter the Shift name and shift timings.
- Click on save button. The added shift times can be edited using the edit icon.
1.15. Add Shift Times
- Designations: The different designations of the user under all the departments have to be uploaded in this page.
- Click on the “Add Designation” button.
- Enter the Designation.
- Select the “Is Clinical” check box if the designation is clinical.
- Click on save button. The added designation can be edited using the edit icon.
1.16. Add designation

- Service: The lab services can be created here. Add the service category and service sub category then add service in the Service page. Add the lab tests in the lab test page. Add lab group and lab package for lab tests.
- Service Category: Under service category, click on “Add Service Category” button. Enter the category, check the Is active checkbox to make the category available and click on save.
1.17. Add Service Category
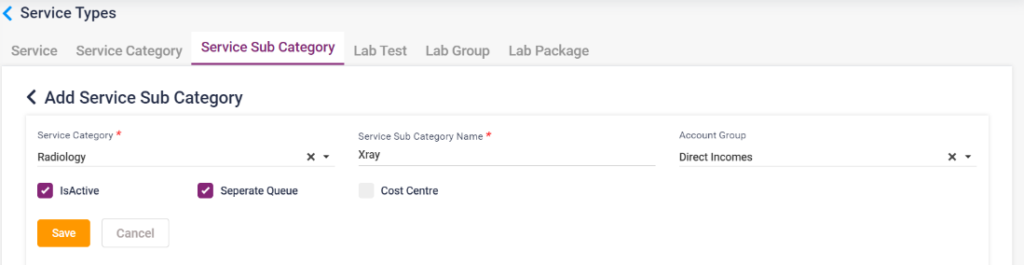
- Service Sub Category: Under service sub category, click on “Add Service Sub Category” button. Select the category, Enter the sub category name, select the Account group, check the Is active checkbox, separate queue check box, cost centre accordingly and click on save.
1.18. Add Service sub Category
- Service: Under service, click on “Add Service” button. Enter the service name and price, Select the category and sub category, select the department, select the referral detail whether the service is associated with patient referral, doctor revenue or no sharing. Check the Is active checkbox, Is Editable check box accordingly and click on save.
1.19. Add service

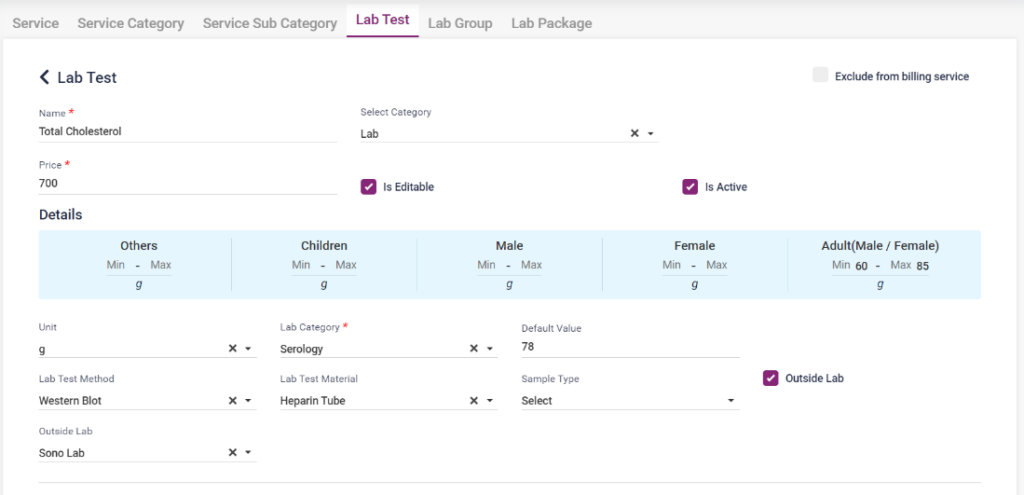
- Lab Test: Under Lab test click on the “Add Lab test” button,
- Name: Enter the lab test name.
- Select Category: Select the service category
- Price: Enter the price of the test.
- Check the Is active checkbox, Is clinical check box accordingly
- Unit: Select the unit related to the test.
- Lab Category: Select the lab category.
- Default value: Enter the default value.
- Lab Test Method: Select the lab test method.
- Lab Test Material: Select the lab test material.
- Sample type: Select the sample type.
- Outside lab: Select the check box if it is an outside lab.
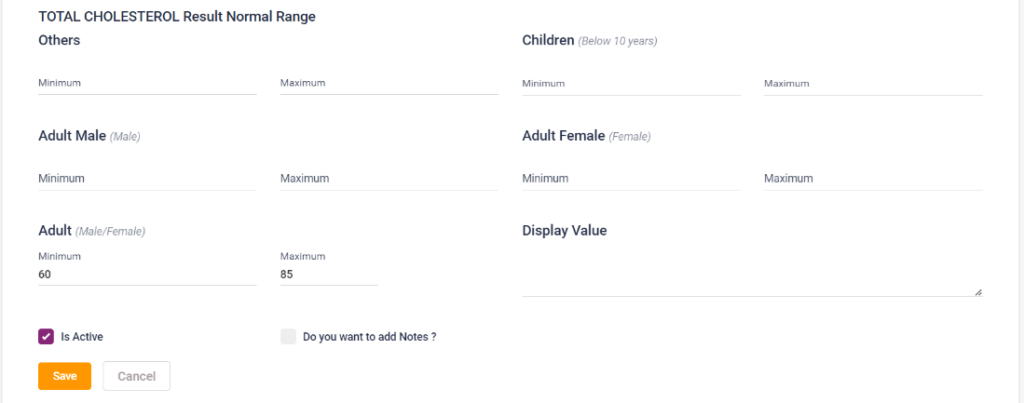
- Enter the minimum and maximum range of the test results for children, Adult male, Adult Female, Adults, others and the display value.
- Check the Add notes check box, to enter notes in the notes field. Check the Is Active checkbox and click on “Save” button.
1.20. Add Lab test
- Lab Group: Under lab group click on the “Add lab group” button. Enter the Group name and price, select the service category, department and the tests to include in the package. Check the Check the Is active checkbox, Is Editable check box accordingly. Check the Add notes check box, to enter notes in the notes field. Click on save.
1.21. Add Lab Group
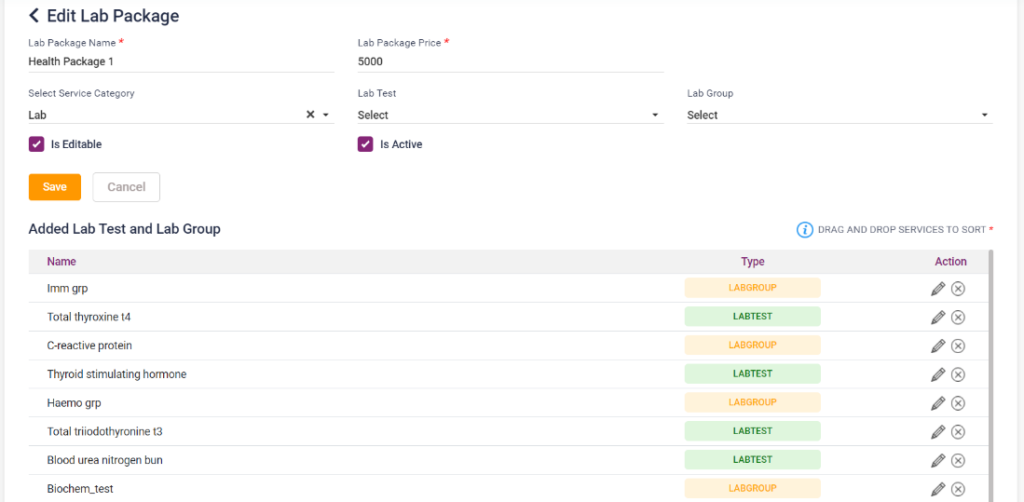
- Lab Package: Under the lab package click on the “Add Lab Group”. Enter the lab package name and package price, select the service category, lab test and lab group. Click on the “Save” button.
1.22. Add Lab Package
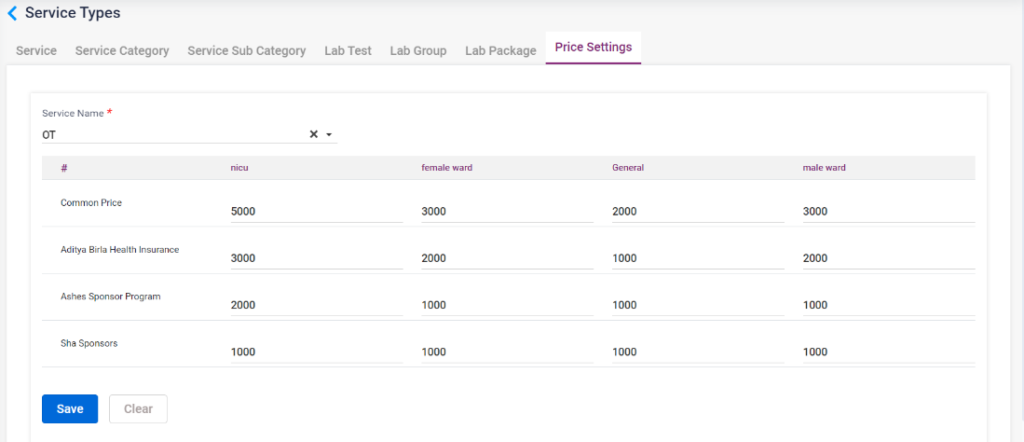
- Price Settings :
- Under the price settings, click on the “Service Name”. Enter the common prices for the wards and also the prices for the ward according to the Insurance parties.
- When this service is added for the patient then the patient will charged the given common price.
- If the service added has the insurance parties to pay then the amount will be charged according to the respective insurance parties.
1.22a. Price Settings
- Doctor: To enter the details of the doctors in the hospital, fill in the following details.
- Personal Details
- Dr Name: Enter the name of the physician.
- Last Name: Enter the last name of the physician.
- Display Name: Enter the display name of the physician.
- Gender: Select the gender of the doctor.
- Date of Birth: Enter the DOB of the physician.
- Age and Email: Enter the age and email of the physician.
- Enter the mobile number, alternate mobile number and work phone of the doctor.
- Enter the Pan card number of the doctor.
- Enter the department and the job type of the doctor.
- Enter the communication address details.
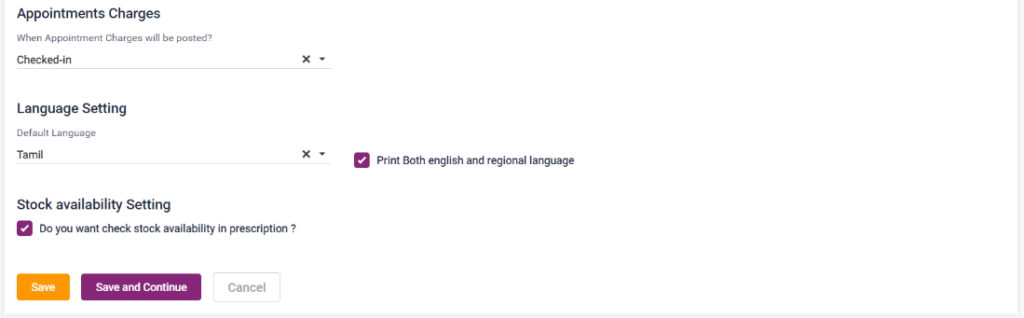
- Appointment Charges: Select when the appointment charges must be posted.
- Select the default language and print language.
- Check the stock availability check box if the stock availability must be shown in the prescription.
1.23. Add physician- personal details
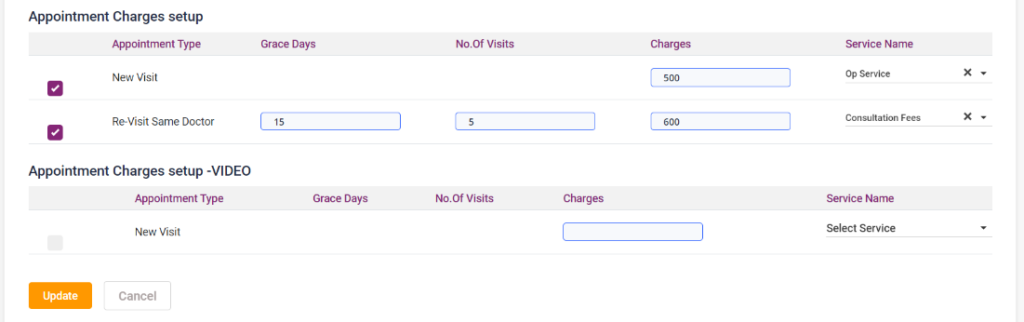
- Data Settings
- Physician settings for EHR can be managed here.
- Appointment charges for the doctor for clinic and video call can be set here.
- The grace period can be given, if the person revisits, then the appointment fee can be reduced here.
- The number of revisits can also be configured.
- Appointment Charges setup: Tick the New Visit check box and enter a consultation charge for the first visit. Select a service name.
- Tick the Re visit same doctor check box, enter the grace days and the number of re-visits allowed for same doctor for less consultation charges.
- Enter the re-visit charge and select service.
- To get the re-visit charge entered, the patient must visit the doctor for the number of re-visit times entered within the grace period given.
- For video call, enter the new visit charge and select service.
1.24 Add physician – Data settings
- Qualification
- Select the Qualification, short name, enter the year of pass, select the institution, city name and country and select the add button.
- More than one qualification can be added and saved.
1.25. Add physician – Qualification
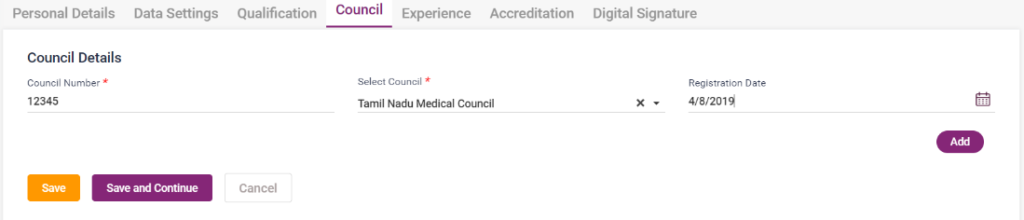
- Council Details
- Enter the council number, select the council and the registration date.
1.26. Add physician – Council
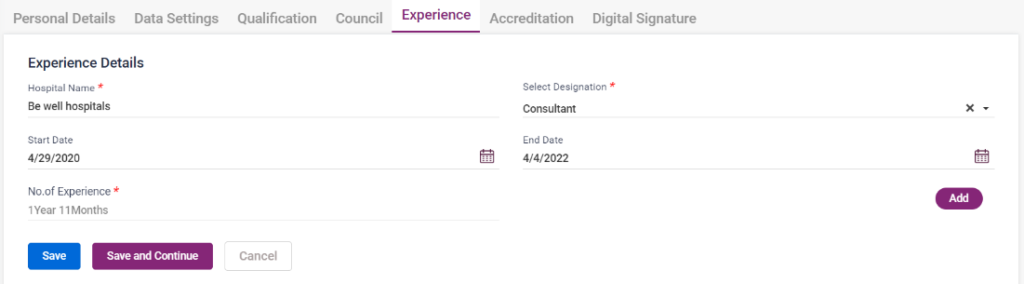
- Experience
- Enter the Hospital name, designation, start date and end date. After entering click on add button. The user can add multiple experience details of the doctors.
1.27. Add physician- Experience

- Accreditation
- Select the accreditation name, accreditation and registration date. After entering click on add button. The user can add multiple accreditation details of the doctors.
1.28. Add physician- Accreditation
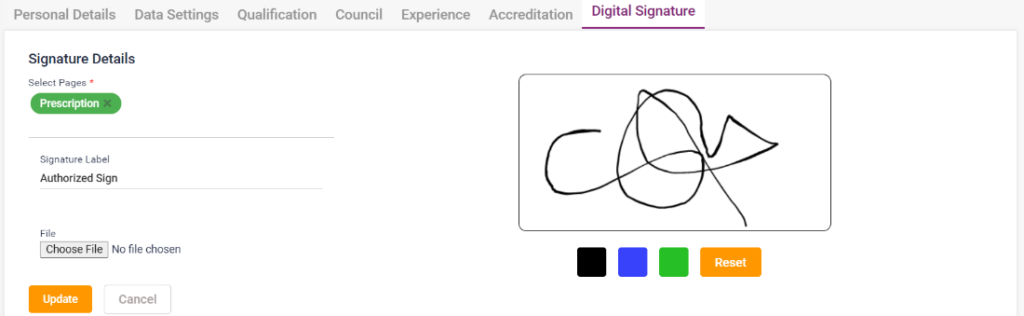
- Digital Signature
- The digital signature of the doctor can be uploaded in this tab.
1.29. Add Physician- Digital Signature
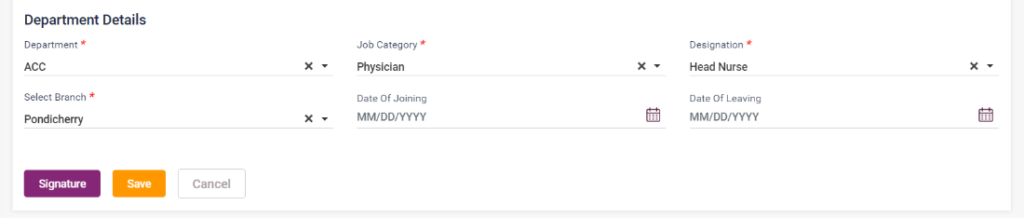
- Employee: Add the employee in the hospital by adding their details.
- Click on the “Add Employee” button.
- In the Add Employee, personal details page select the title, enter the first name, last name, gender, DOB, Email, mobile number, alternate mobile number and work phone number, marital status and employee type.
- Enter the communication address.
- Enter the department details, job category, designation, branch and date of joining and then click on the save button.
- Signature can be added for the employee using the Add signature button.
1.30. Add Employee
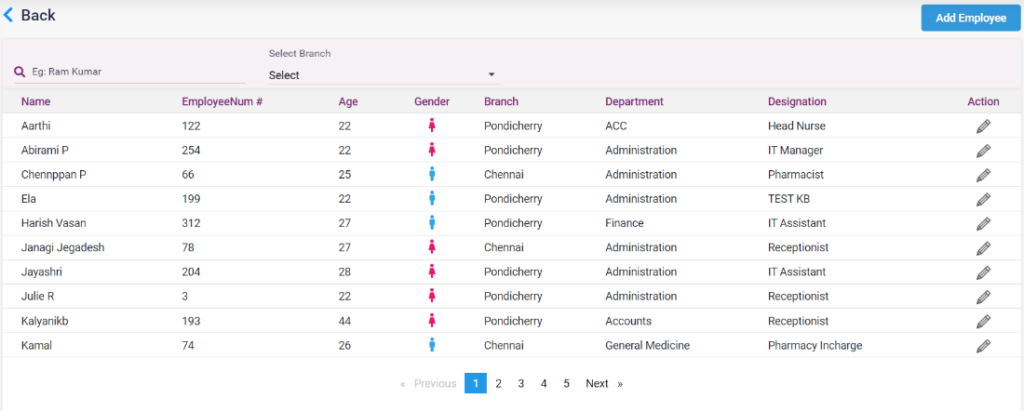
1.31. Employee List
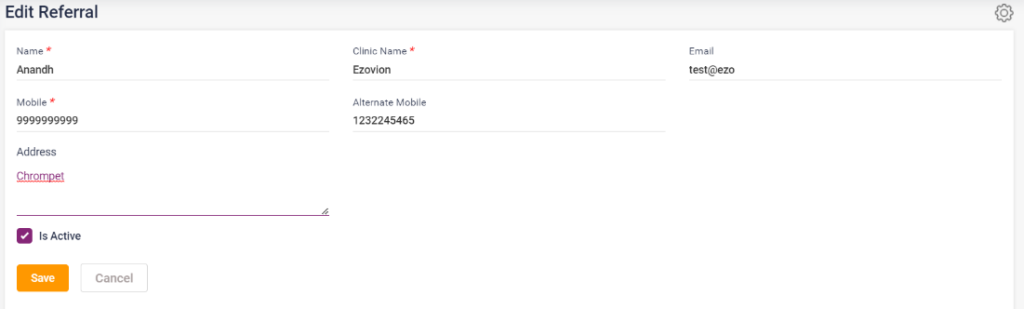
- Referrals: Add the referrals and referral details.
- Click on the “Add Referral” button.
- Enter the name, clinic name, email, mobile number, alternate mobile and address.
- Check on the “Is Active” check box to make the referral active.
- Click on the save button to save the referral.
1.32. Add Referral
- Visit Mode: To log in the visit modes
- Click on the “Add Visit Mode” button.
- Enter the visit mode and check on the “Is Active” check box to make the visit mode active. After that click on the “Save” button.
1.33. Add Visit mode

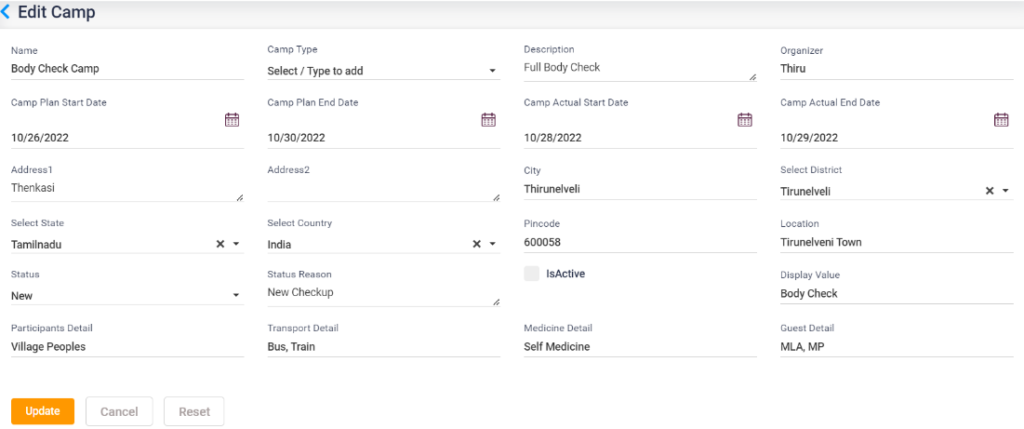
- Camp: Enter the camp details.
- Click on the “Add Camp” button.
- Enter the camp details.
- Click on the save button.
- Credit note for the camp can be added using the credit note icon.
1.34. Add camp
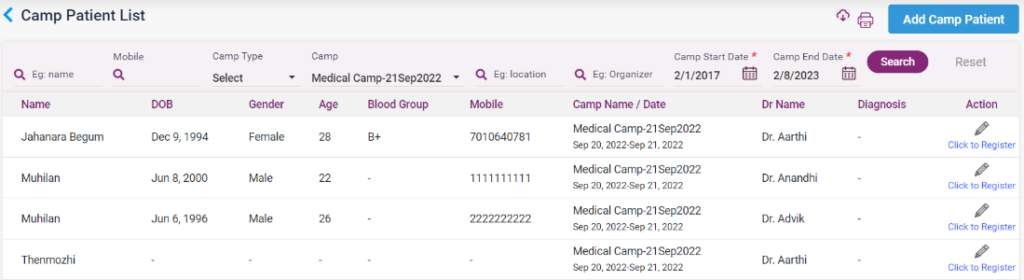
- Camp Patient List.
- Click on the “Add Camp Patient” button.
- Select the doctor name and camp name.
- Enter the details of the patient.
- Click Add & New to add the patient to the list and enter new patient details.
- Click on add to add the patient.
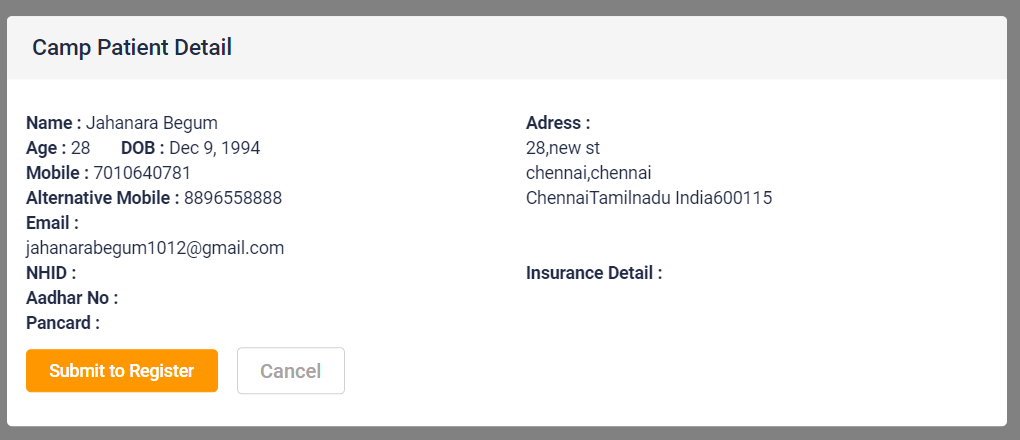
- Select the patient and click the “click to register” to register the patient in the Ezovion HMS.
1.35. Add Camp Patient
1.36. Patient List
1.37. Submit to register patient
- ACCOUNTS
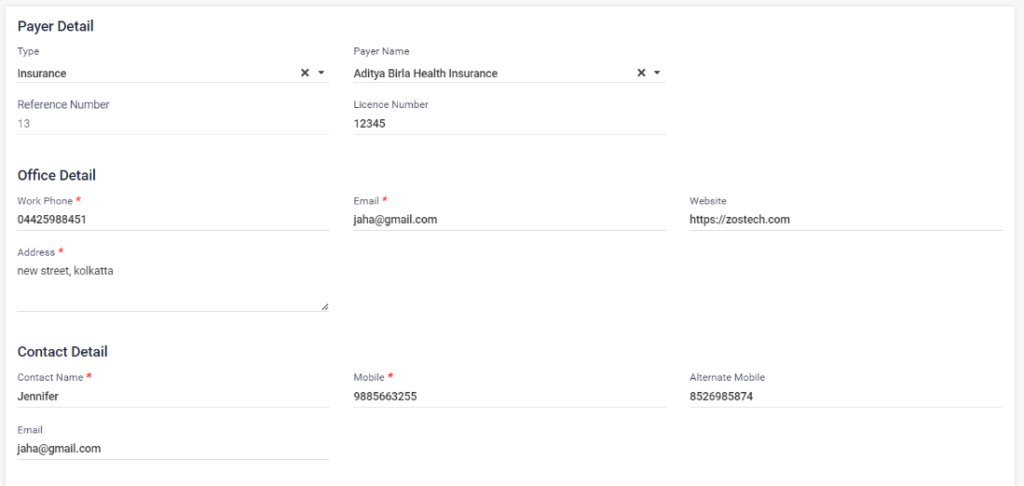
- Payer: To enter the payer details of the patient
- Click on the “Add Payer” button.
- Select the payer type, and enter the payer name.
- Enter the office details of the payer.
- Enter the contact details and other details of the payer.
- Check the Active and discount Applicable checkbox if needed.
- Click on the “save” button.
1.38. Add payer

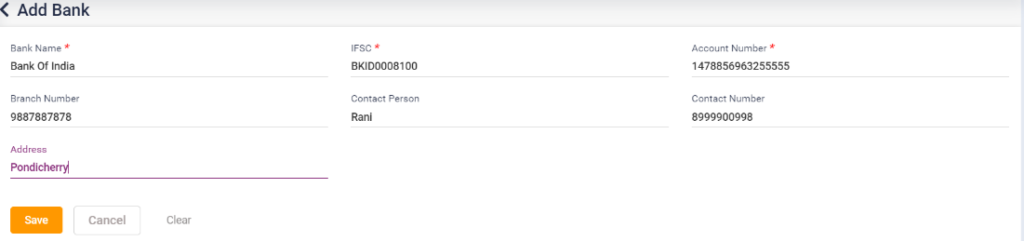
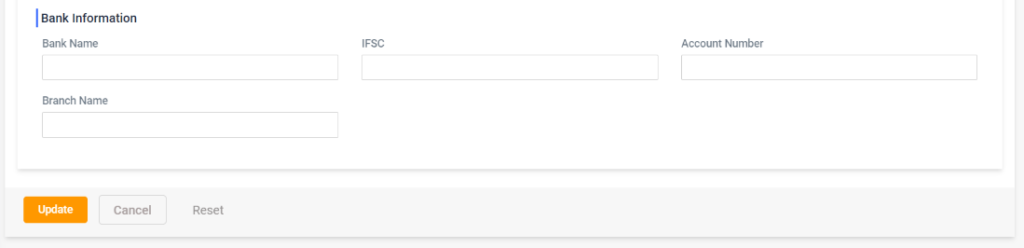
- Bank: To enter the bank details of the hospital
- Click on the “Add Bank” button.
- Enter the bank name, IFSC code, account number, branch number, contact person name, contact number and address.
- Click on the save button.
1.39. Add Bank
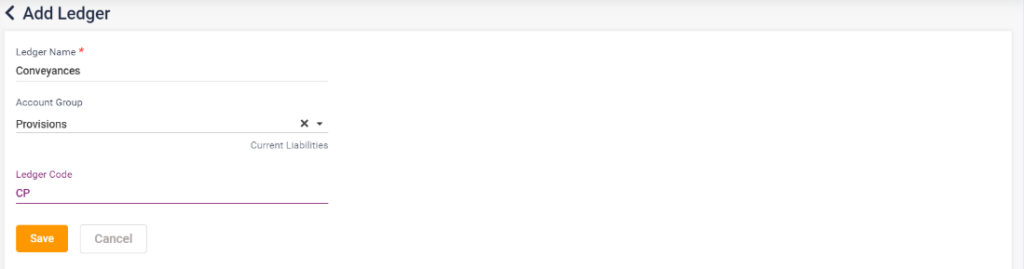
- Ledger: To add the ledger options in the hospital.
- Click on the “Add Ledger” button.
- Enter the ledger name, accounts group and ledger code.
- Click on the save button.
1.40. Add Ledger
- Accounts Group: To enter the accounts group options.
- Click on the “Add Accounts Group” button.
- Enter the accounts group name and select the accounts group.
- Click on the save button.
1.41. Add accounts group

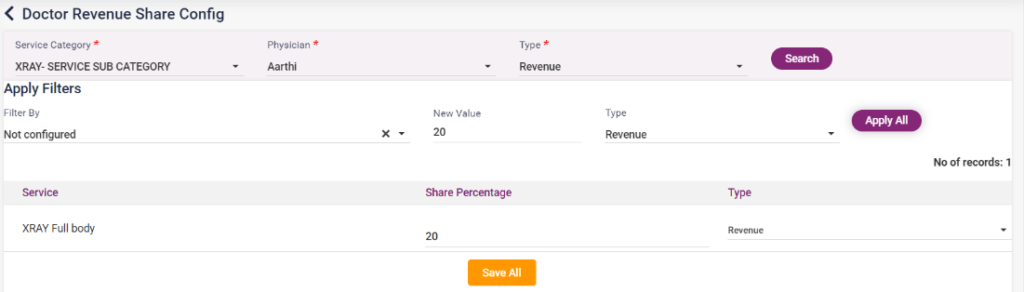
- Doctor Revenue Share Config: To configure the doctor revenue for services.
- Select service category for which doctor revenue has been already set in the service master.
- Select the doctor name for whom you want to configure revenue sharing.
- Select the type accordingly. If you want to set revenue for doctor select doctor revenue. If you want to set the service for referral then select referral. Select no sharing for which either has been set.
- Once the above details are filled click on the search button. The respective search results will be shown below.
- If you want to set the same value for all the services shown select not configured in the filter by field, enter the new value, select type and click on apply all button.
- If you want to change the old value for all the services shown below, select old value in the filter by field, enter the new value, select the type and click on the apply all button.
- This configuration can be done for all the services individually in the list.
- This has to be set for each doctor by changing the doctor name in the search field.
1.42. Doctor Revenue Share Config
- MEDICAL HISTORY
- Social Habits: To enter the social habits.
- Click on the “Add Social Habit” button.
- Enter the social habit name and click on save button. Social habit includes smoking, drinking etc.
1.43. Add Social Habit

- Allergy: To enter and log the various allergies.
- Click on the “Add Allergy” button.
- Enter the allergy name and click on the save button.
1.43. Add Allergy

- Medical History: To enter the medical history present for the patients.
- Click on the “Add Medical History” button.
- Enter the Medical history and check the “Is Active” check box.
- Click on the save button.
1.44. Add Medical history
- CASE SHEET
- Chief Complaints: To log the chief complaints.
- Click on the “Add Chief Complaint” button.
- Enter the Complaint, select the department and check the Is active check box.
- Click on the save button.
1.45. Add chief complaints
- Examination: To log in the various examination present.
- Click on the “Add Examination” button.
- Select the type of examination, name of the examination, select the department and check the Is Active check box.
- Click on the save button.
1.46. Add Examination

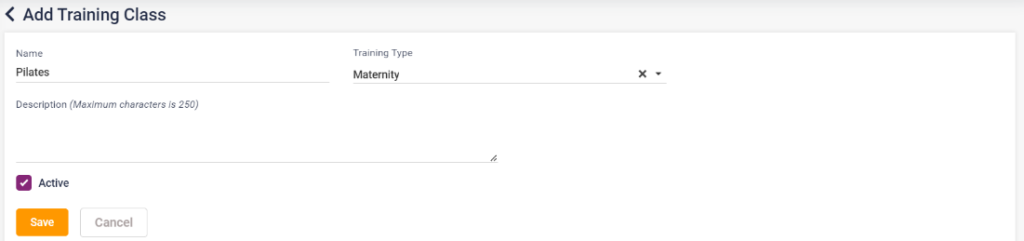
- Training Class: To log in the training classes present inside the hospital.
- Click on the “Add Training Class”.
- Enter the name of the training class, select the training type, enter description and select the Is active check box.
- Click on the save button.
1.47. Add Training class
- Instruction: To add the instructions for the patients.
- Click on the “Add Instruction” button.
- Enter the Instruction, select the department, check the Is active check box.
- Click on the Save button.
1.48. Add Instruction

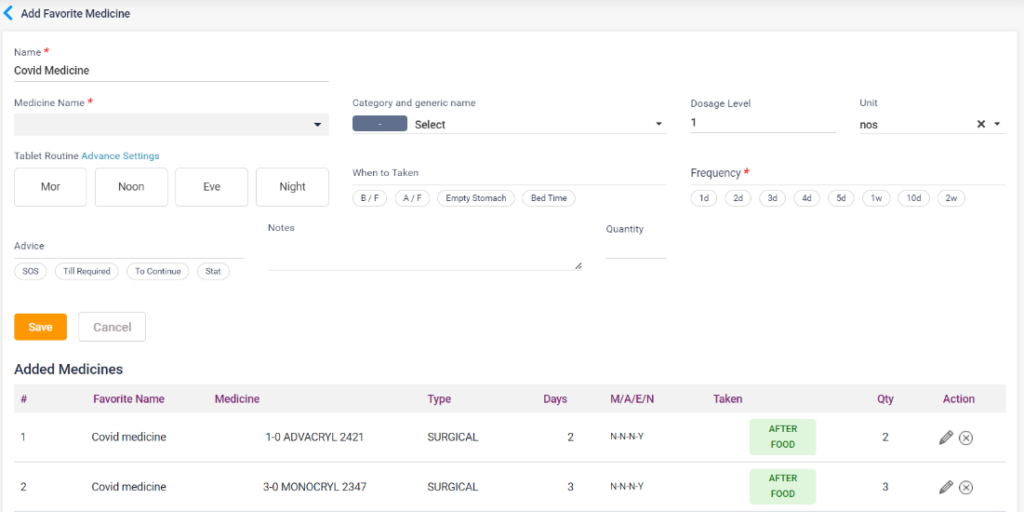
- Favorite Medicine: To log the frequently prescribed medicine combinations under favorites.
- This option is mainly used to load the medicine package which is prescribed often by the doctor. Instead of selecting again and again, the favorite can be loaded at once.
- Click on the “Add Favorite Medicine” button.
- Add the medicines and the routine, the days the tab has to be taken and all other fields.
- Give a name for the added medicines.
- This will be loaded in Favorite medicine fields wherever applicable.
1.49. Favorite medicine
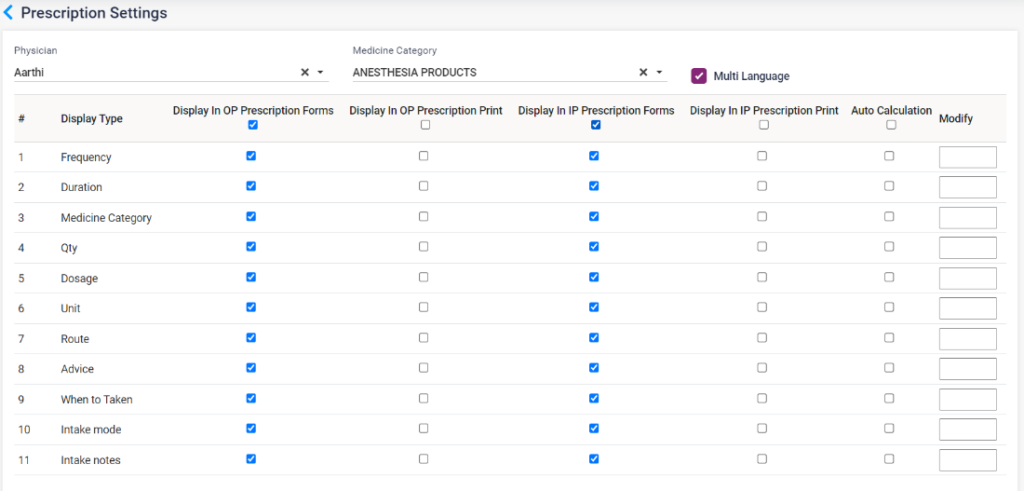
- Prescription Settings: To set the prescription options according to the doctor.
- The prescription can be set for the doctor individually.
- Select the doctor and medicine category and modify how the prescription should load according to the physician’s IP and OP prescriptions.
- Click on the save button.
1.50. Prescription settings
- DENTAL EHR
- Dental Procedure: To add the various dental procedures present.
- Click on the “Add Procedure” button.
- Enter the dental procedure name and price and click on the save button.
1.51. Add dental procedure

- Dental Problem: To enter the various dental problems present.
- Click on the “Add Problem”.
- Enter the problem name and select the department.
- Click on the save button.
1.52. Add dental problem
- Treatment Plan: To log in the various treatment plans present.
- Click on the “Add Treatment Plans” button.
- Enter the treatment plan, select the department and classification.
- Click on the save button.
1.53. Add treatment plan
- OBSTETRICS AND PEDIATRICS EHR
- Combo Vaccine: To add the combo vaccines.
- Click on the “Add Combo Vaccine” button.
- Search the medicine name and the vaccine name and click on save.
- The selected vaccines will be displayed in the combo vaccine list.
1.54. Combo vaccine

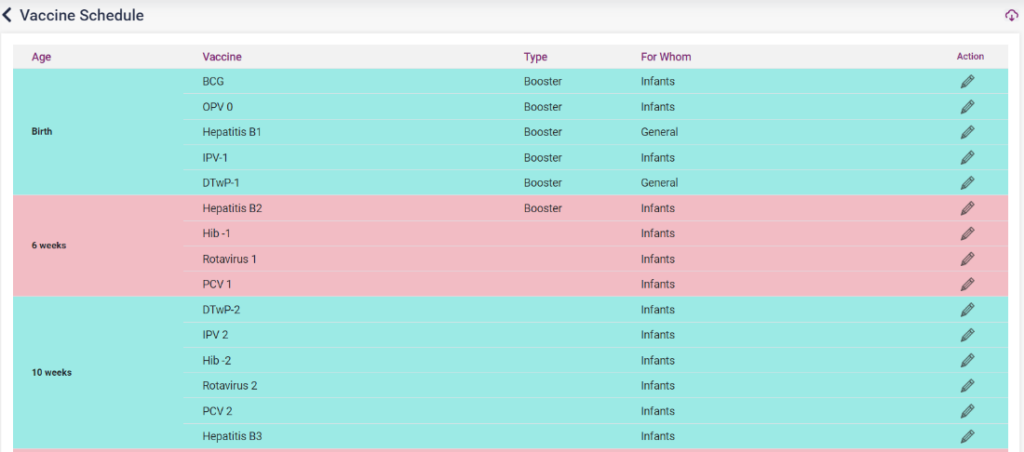
- Vaccine Schedule: To alter the vaccine schedule.
- Click on the edit option of any vaccine, and edit the available options and click on save
1.55. Vaccine Schedule


- PHARMACY
- Store: To log in the pharmacy store of the hospital.
- Click on the “Add Store Name” button.
- Enter the store name and check the Is active check box.
- Click on the save button.
1.56. Add Store
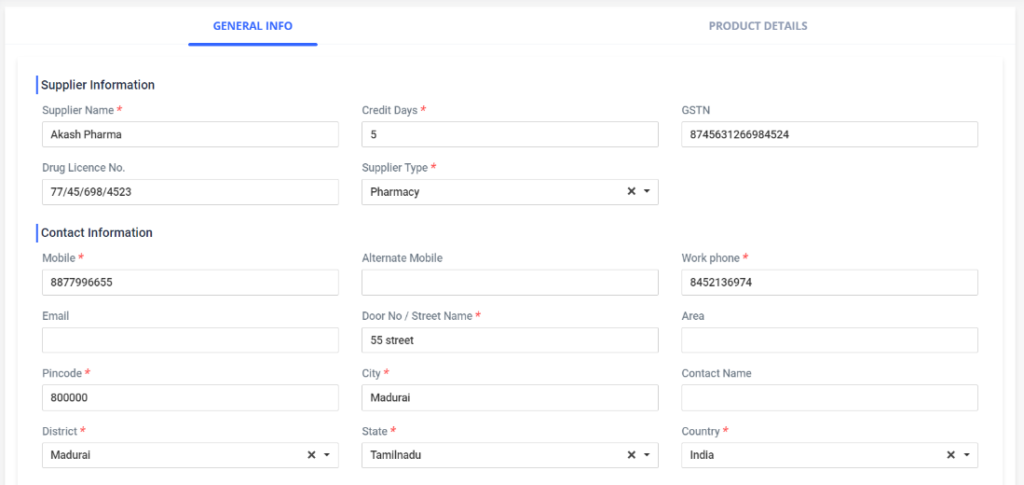
- Supplier: To log in the supplier details, who provide the medicinal requirements for the hospital.
- Click on the “Add” icon.
- Under general details, enter the supplier information, contact information and the bank information of the supplier.
- Under Product details, add the medicines, assets and inventory items provided by the supplier.
- The added supplier details will be displayed in the Supplier list page.
- The added supplier details can be edited using the edit option
- Upon clicking the dashboard icon of the supplier, the dashboard of the supplier will be shown. It includes recent purchased list of items.
- Upon clicking the credit note icon, the user can add the credit note for the particular supplier. The added credit notes will be shown in the Inventory-> Accounting -> Credit Note page.
- Upon clicking the last Edit icon, the supplier payment page will be shown. The payment for the supplier can be done from here.
1.57. Add Supplier- General Info
1.58. Add supplier- Product details
- Storage Shelf: To enter the storage shelves present in the pharmacy.
- Click on the “Add Storage Shelf” button.
- Enter the shelf name and click on the save button.
1.59. Add Storage Shelf
- Medicine: To login the medicines present in the hospital.
- Click on the “Add Medicine”.
- Medicine Name: Enter the Medicine name.
- Medicine Type: Select the type of medicine.
- Pharma Manufacturer: Select the manufacturer of the medicine.
- Medicine Category: Select the medicine category.
- Generic Name: Select the generic name of the medicine.
- Rack Name: Select the Rack name where the medicine is present inside the pharmacy.
- Units: Enter the units of the medicine.
- HSN Code: Enter the HSN Code of the medicine.
- GST: Enter the GST of the medicine.
- Min Qty: Enter the minimum quantity of the medicine which should be present inside the pharmacy.
- Max Qty: Enter the maximum quantity of the medicine which should be present inside the pharmacy.
- Is Vaccine: Select this check box if the entered medicine is a vaccine.
- Is Archive: Select this check box to archive the medicine.
- Click on the save button.
1.60. Add medicine
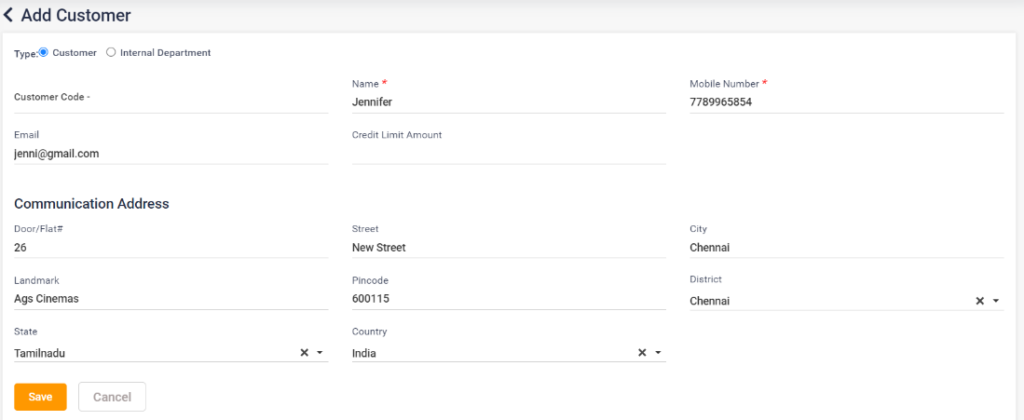
- Customer: To add the regular customers of the pharmacy.
- Click on the “Add Customer” button.
- Enter the type of the customer.
- Enter the name, mobile number, email and credit limit amount.
- Enter the communication address details of the customer.
- Click on the save button.
1.61. Add customer
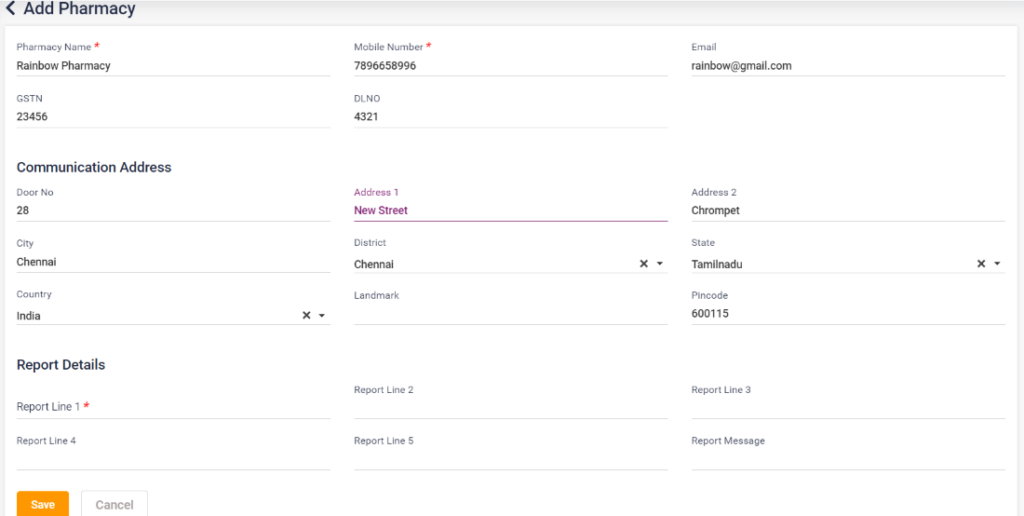
- Pharmacy Locations: To add the various pharmacy details.
- Enter the name of the pharmacy, mobile number, email GSTN and DL number.
- Enter the communication address of the pharmacy.
- Enter the report line details for the pharmacy.
1.62. Add Pharmacy
- OT
- Checklist: To add the checklist for the OT under the OT Schedule- Surgery Team.
- Click on the “Add Checklist” button.
- Enter the name of the tests or any others needed for check list in the checklist name an click on the save button.
1.63. Add checklist
- CSSD: To add the CSSD items needed for the OT.
- Click on the “Add CSSD Item” button.
- Enter the CSSD name and click on the save button.
1.64. Add CSSD

- Count: To add the counts needed for the OT.
- Click on the “Add Count” button.
- Enter the Count name and select the count type.
- Click on the save button.
1.65. Add Count
- Implant: To add the Implants in the list.
- Click on the “Add Implant” button.
- Enter the Implant name and click on the save button.
1.66. Add Implant

- Surgery: To add the surgeries present in the hospital.
- Click on the “Add Surgery” button.
- Enter the surgery name, ICD Code, CPT code and the price of the surgery.
- Click on the save button.
1.67. Add Surgery
- Table: To log in the table details present in the hospital.
- Click on the “Add Table details” button.
- Enter the table number, nursing counter, enter the rent of the table, select the Is active check box.
- Click on the save button.
1.68. Add Table

- OT Cancel Reason: To enter the reasons to cancel the operation.
- Click on the “Add OT Cancel Reason” button.
- Enter the cancel reason and click on the save button.
1.69. Add OT Reason

- Medicine Package: To enter the medicine package for the OT.
- Click on the “Add Medicine package” button.
- Enter the package name, select the medicine names and their quantity and click on the add medicine button.
- After adding the needed medicines, click on the save button.
1.70. Add Medicine package

- Keyrole Vs Service: To enter the role and services of the employees.
- Click on the “Add Keyrole and Service Mapping” button.
- Select the keyrole and select the service to map.
- Click on the save button.
1.70. Add key role and service
- LAB
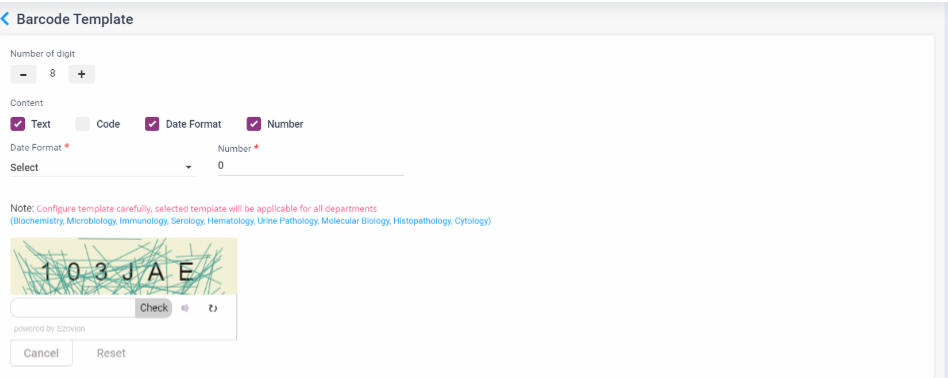
- Bar Code Template: To set the bar code template for the lab tests.
- Select the number of digits for the template.
- Select the context code, text, date format or number.
- Select the date format and the number.
- Enter the captcha characters and click on the check button.
- Click on the save button.
- Select the template carefully because this is a onetime setting, and this is applicable for all the departments of the lab.
1.71. Add barcode template
- Lab Test Material: To enter the lab test materials.
- Click on the “Add Lab Test Material” button.
- Enter the name of the lab test material and select the Is active checkbox.
- Click on the save button.
1.72. Add lab test material
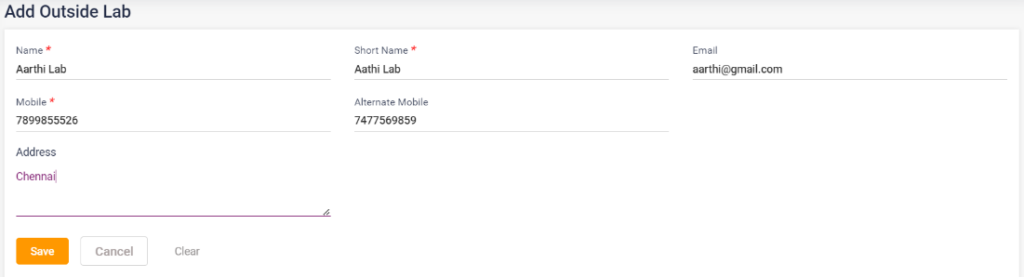
- Outside Lab: To enter the lab names which the hospital would recommend.
- Click on the “Add Outside Lab” button.
- Enter the name, short name, mobile number, alternate mobile number, email and address of the outside lab.
- Click on the save button.
1.73. Add outside lab
- LEM (Lab Equipment Manufacturer): To enter the machine details in the lab.
- Click on the “Add LEM” button.
- Enter the machine name, machine code and purpose.
- Click on the save button.
1.74. Add LEM
- IP (In Patient)
- Admission Type: To log in the admission types.
- Click on the “Add Admission Type” button.
- Enter the admission type.
- Click on the Save button.
1.75. Add admission type
- Diet Plan: To log in the diet plans for the in-patients.
- Click on the “Add Diet Plan” button.
- Enter the diet name and click on the Is active check box.
- Click on the save button.
1.76. Add diet plan

- Discharge Type: To log in the discharge reasons of the patient.
- Click on the “Add Discharge Reason” button.
- Enter the discharge reason and check the Is active check box.
- Click on the save button.
1.77. Add discharge type
- Ward: To log in the ward details.
- Click on the “Add Ward” button.
- Enter the ward name and select the ward mapping number.
- Enter the full day tariff, half day tariff and the hourly tariff.
- Enter the people allowed. Select the facilities needed inside the ward.
- Select the calculation method, according to 24 hours or the checkout time.
- Check the Is ICU checkbox if the ward is an ICU, uncheck if it is not.
- Check the Is active checkbox and click on the save button.
1.78. Add ward

- Building: To log in the buildings present in the hospital.
- Click on the “Add Building” button.
- Enter the building name and click on the save button.
1.79. Add building

- Floor: To log in the floor details of the buildings.
- Click on the “Add Floor” button.
- Select the building name and enter the floor name present in the building.
- Click on the save button.
1.80. Add floor

- Room: To log in the room details present in the hospital.
- Click on the “Add Room” button.
- Select the building name, floor name and enter the room number in the floor.
- Select the IS active check box and click on the save button.
1.81. Add Room

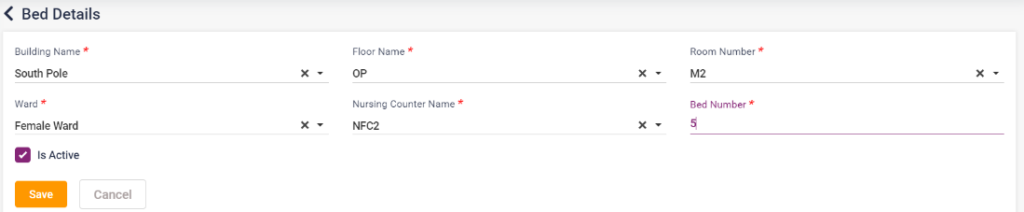
- Bed: To log in the bed details which are present in the hospital.
- Click on the “Add Bed” button.
- Select the building name, floor name, room number, ward, nursing counter name ad enter the bed number.
- Select the Is active check box.
- Click on the save button.
1.82. Add Bed
- Nursing Counter: To log in the nursing counter details.
- Click on the “Add Nursing Counter” button.
- Select the building name, floor name and enter the nursing counter name.
- Click on the save button.
1.83. Add Nursing counter

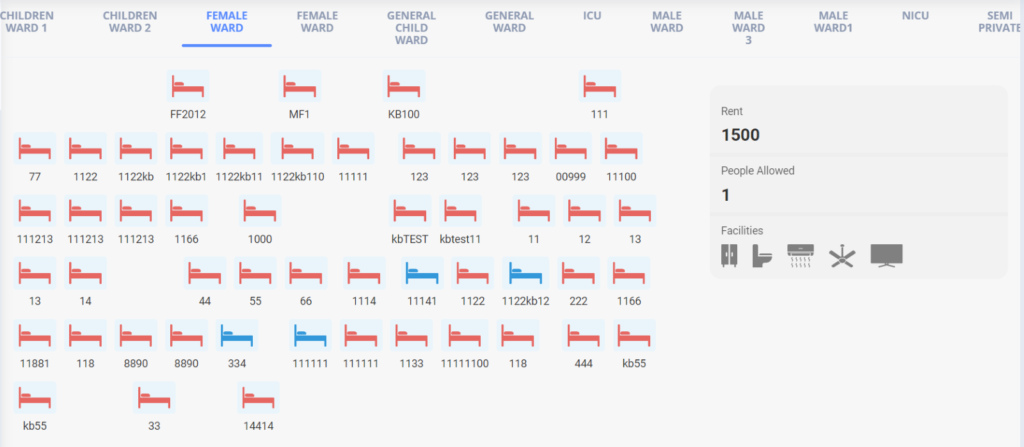
- Bed View: To view the beds in the wards.
- Upon selecting the Bed View button, the view of the added beds under all the added wards will be displayed.
- When you select a ward name the room rent, people allowed and the facilities will be shown in the box.
- The available beds will be in blue color.
- The booked beds will be in red color.
1.84. Add Bed View
- INVENTORY
- Item Category: To enter the different categories of inventory items.
- Click on the “Add Item Category” button.
- Enter the code and the category name.
- Click on the save button.
1.85. Add item category

- Item Sub Category: To enter the different sub categories of inventory items.
- Click on the “Add Item Sub Category” button.
- Enter the code and the sub category name.
- Select the category, enter the description.
- Select the services to display the services mapped with OT.
- Click on the save button.
1.86. Add item sub category

- Item Manufacturer: To enter the different manufacturers of inventory items.
- Click on the “Add Item Manufacturer” button.
- Enter the code and the manufacturer name.
- Click on the save button.
1.87. Add Item Manufacturer

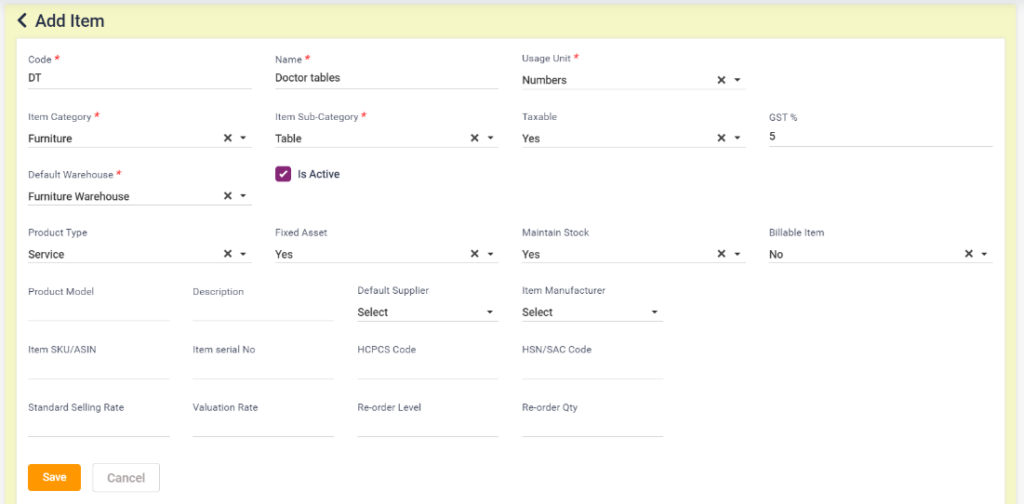
- Item: To add the Inventory items.
- Click on the “Add Item” button.
- Enter the item code and item name.
- Select the usage unit.
- Select the Item category, item sub category, select whether the item is taxable, if taxable enter the GST percentage.
- Select the default warehouse and select the Is active checkbox.
- Select the product type, select the fixed asset if yes or no.
- Select yes in the maintain stock field to maintain the item in the inventory stock.
- Under billable item, select yes to display the item in the inventory sales list.
- Enter the other details if needed and click on the save button.
1.88. Add Item
- Warehouse: To add the warehouse details of the item.
- Click on the “Add Warehouse” button.
- Enter the warehouse code, warehouse name, short name and address.
- Select the Is active checkbox and click on the save button.
1.89. Add Warehouse
- QC Reason: To add the reasons for Quality control.
- Click on the “Add QC Reason” button.
- Enter the reason and description.
- Click on the save button.
1.90. Add QC Reason

- Scrap Reason: To add the reasons to dispose the item in the scrap.
- Click on the “Add Scrap Reason” button.
- Enter the reason name and click on the save button.
1.91. Add scrap reason

- Credit Note Reason: To add the reasons to enter a credit note.
- Click on the “Add Item Credit Note” button.
- Enter the credit note reason and click on the save button
1.92. Add credit note reason

- Debit Note Reason: To add the reasons to enter a debit note.
- Click on the “Add Item Debit Note Reason” button.
- Enter the debit note reason and click on the save button.
1.93. Add debit note reason

- Internal Department: To add the various Internal departments present in the hospital.
- Click on the “Add Item Internal Department” button.
- Enter the Internal department name, code and location.
- Click on the save button.
1.94. Add Internal Department
- Vehicle: To add the vehicles present in the hospital.
- Click on the “Add Vehicle” button.
- Enter the vehicle type, vehicle identification number and vehicle owner details.
- Click on the save button.
1.95. Add Vehicle
- Carrier: To add the carrier and their details.
- Click on the “Add Carrier” button.
- Enter the carrier name, code, account ID, freight code.
- Select the system data flag check box.
- Click on the save button.
1.96. Add Carrier

- ASSET
- Asset Type:
- Click on the “Add Asset type” button.
- Enter the name of the asset type and click on the save button.
1.97. Add Asset Type
- Asset Sub Type:
- Click on the “Add Sub Type” button.
- Select the asset type and enter the sub type name and click on the save button.
1.98. Add Asset sub type

- Asset Master:
- Click on the “Add Asset” button.
- Enter the asset name, select the asset type, asset sub type and owning type.
- Enter the brand name, asset location, select the custodian in charge.
- Enter the serial number, manufacturer model.
- Select the life cycle expiry date and warranty expiry date.
- Click on the save button.
1.99. Add Asset
- COMMUNICATION
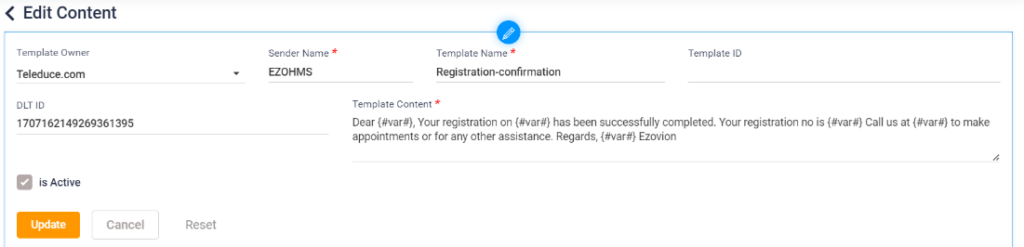
- Content Management: The content for sending SMS for the patients will be managed here.
- Click on the “Add Content” button.
- Select the “Template Owner”.
- Enter the sender name, template name, template ID, DLT ID and template content.
- Select the “Is Active” check box and click on the save button.
1.100. Add Content
1.101. Content management
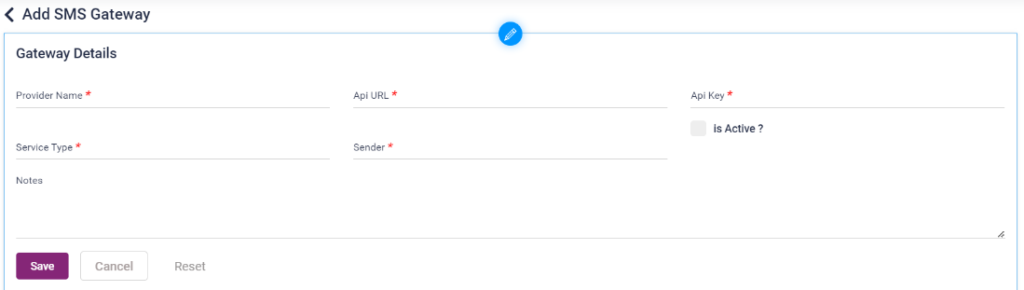
- SMS Gateway Configuration: To Configure the SMS Gateway.
- Click on the “Add Gateway” button.
- Enter the provider name, API URL, API key, Service type, sender and notes.
- Select the “Is Active” check box and click on the save button.
1.102. SMS Gateway Configuration
- BLOOD BANK
- Component Type: To log the component type of the blood.
- Click on the “Add Component Type” button.
- Enter the component name.
- Click on the save button.
1.103. Add component type
- Bag Type: To log the bag type.
- Click on the “Add Bag Type” button.
- Enter the bag type name.
- Click on the save button.
1.104. Add Bag type

- Donation Type: To log the donation type.
- Click on the “Add Donation Type” button.
- Enter the donation type.
- Click on the save button.
1.105. Add donation type

- Donor Type: To log the donor type.
- Click on the “Add Donor Type” button.
- Enter the donor name.
- Click on the save button.
1.106. Add donor type

- TTI type: To log the TTI types.
- Click on the “Add TTI type” button.
- Enter the TTI name.
- Click on the save button.
1.107. Add TTI type

- Transfusion Type: To log the transfusion types.
- Click on the “Add Transfusion Type” button.
- Enter the transfusion type.
- Click on the save button.
1.108. Add transfusion type

- Blood Bank: To add the blood banks.
- Click on the “Add Blood Bank” button.
- Enter the name of the blood bank.
- Select the sub type and category.
- Enter the address details of the blood bank.
- Enter the license details, reporting month and year, bank unique ID and officer incharge.
- Select the “Blood Separation facility available?” check box, “Attached to storage units” check box, “Blood bank supported by NACO?” check box accordingly and click on the save button.
1.109. Add Blood bank
- Blood Donor: To add the blood donor details.
- Click on the “Add Bank Donor”.
- Enter the personal details of the donor.
- Enter the contact details and the relationship with the donor.
- Enter the address details of the donor.
- Select the last donation date of the donor.
- Select the donation preference.
- Check the “Patient agree to be contacted by hospital/donors” if the patient agrees to get contacted by donors.
1.110. Add blood donor
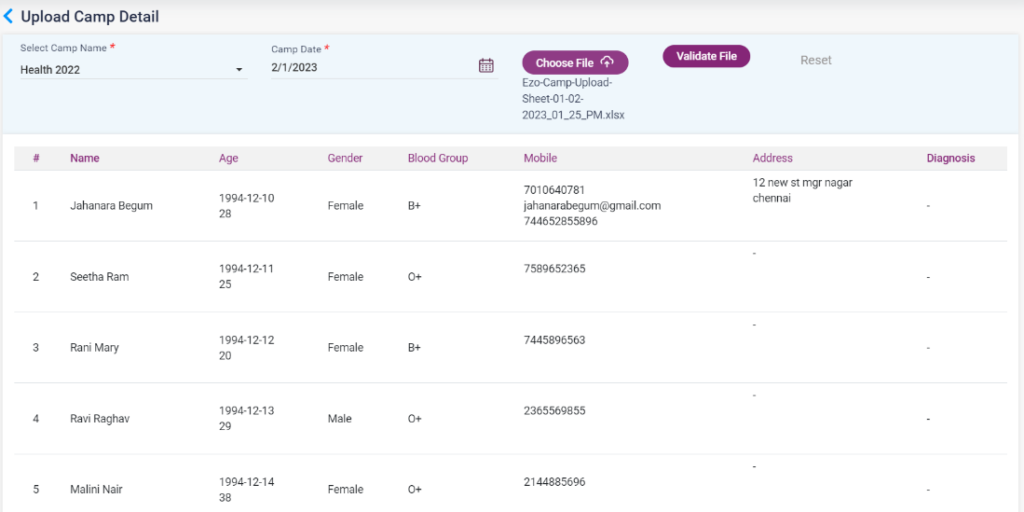
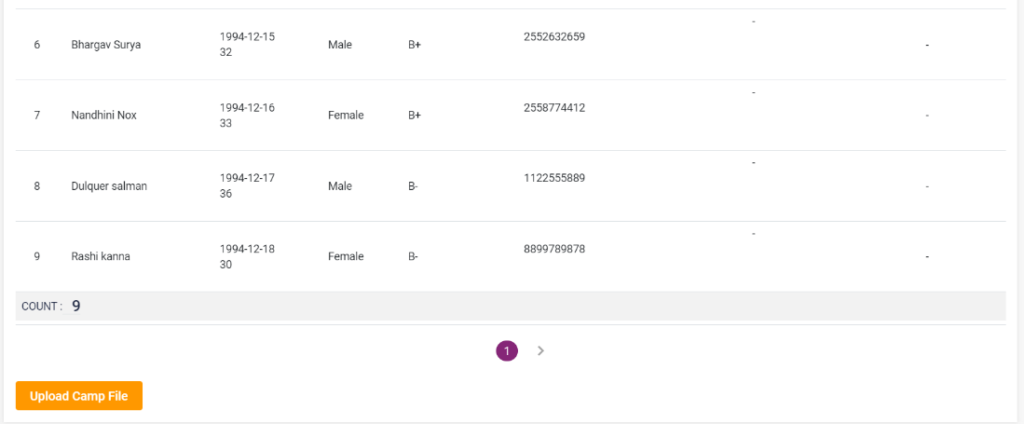
- Camp Upload:
- Select the camp name and date (the camp details already added in the My Hospital->Camp)
- Download the sample excel file, enter the details of the patients in the excel.
- Click on the Choose file button and upload the excel.
- After upload click on the validate file button.
- The entered patient details will be displayed in the screen.
- Click on the “Upload Camp File” button.
1.111. Camp Upload
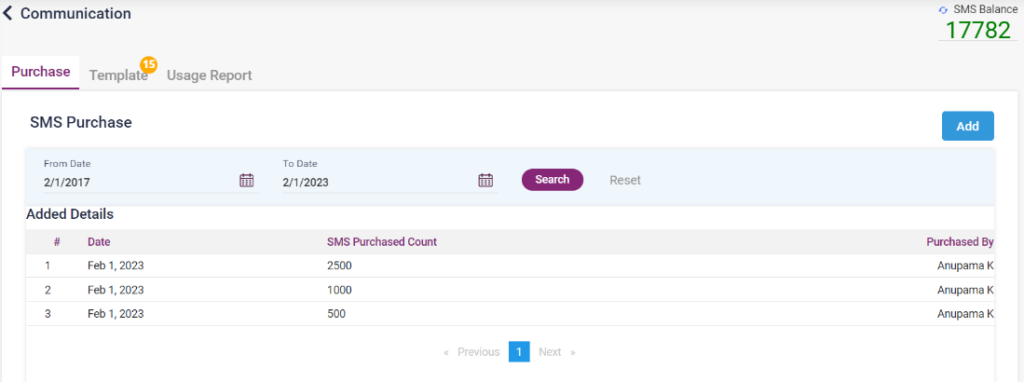
2. Communications
- The SMS which has to be sent for the patients can be set here.
- Under Purchase, click on the “Add” button and choose the number of SMS needed to purchase.
- The balance SMS will be shown in the right corner.
- Under Template, click on the active or de active button for the SMS accordingly.
- Click on the “History” button to see the status of the SMS when it was activated, deactivated and purchased.
- Under usage report, the SMS tracking details are displayed.
2.1. Communications- Purchase
2.2. Communications- Templates
2.3. Communications- Usage Report
3. Templates
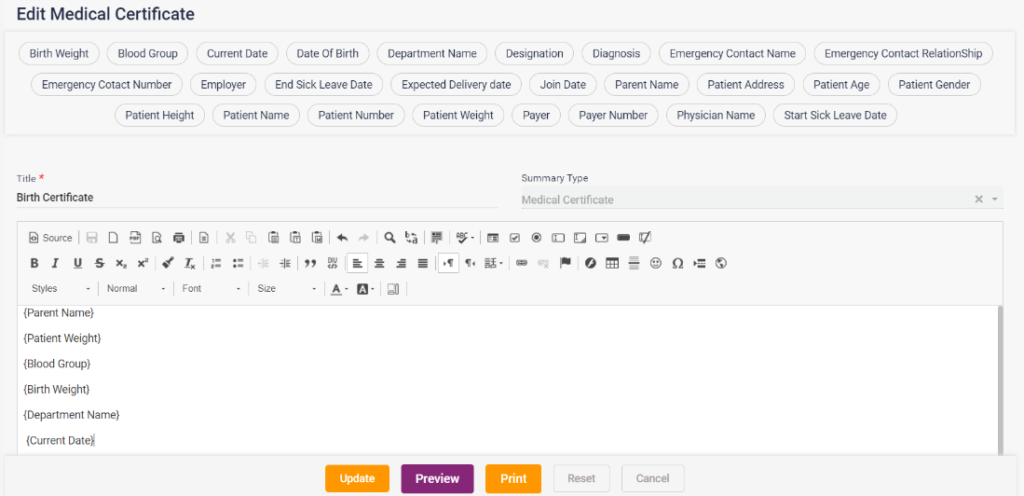
- MEDICAL CERTIFICATE
- Click on the “Add Medical Certificate” button.
- Enter the title of the medical certificate.
- Create a medical certificate according to the needs of the patient or the template of the hospital.
- Click on the save button. This certificate can be loaded for the patient in their settings.
3.1. Add Medical Certificate
- CONSENT FORM
- Click on the “Add Consent Form” button.
- Enter the title of the consent form.
- Create a consent form according to the needs of the patient or the template of the hospital.
- Click on the save button. This certificate can be loaded for the patient in their settings.
3.2. Add Consent Form
- DAY CARE SUMMARY
- Click on the “Add Day Care Summary” button.
- Enter the title of the summary.
- Create a day care summary according to the needs of the patient or the template of the hospital.
- Click on the save button. This summary can be loaded for the patient in their EHR.
3.3. Add Day Care Summary
- EZO TEMPLATE
- Click on the “Add Ezo Template” button.
- Select the template type. The templates available in Ezovion HMS are,
- Discharge Summary – Discharge Summary for the IP Patients.
- OPD Slip – OPD Slip for the OP patients.
- IP Admission Form – Admission form of IP Patients.
- IP Admission Slip – Admission Slip of IP patients.
- XRAY – Day care radiology report for patients who took XRAY related services.
- MRI – Day care radiology report for patients who took MRI related services.
- CT – Day care radiology report for patients who took CT related services.
- MAMMOGRAM – Day care radiology report for patients who took MAMMOGRAM related services.
- USG – Day care radiology report for patients who took USG related services.
- MEDISCAN – Day care radiology report for patients who took MEDICSCAN related services.
- DOPPLER – Day care radiology report for patients who took DOPPLER related services.
- ULTRASOUND – Day care radiology report for patients who took ULTRASOUND related services.
- Enter a name for the template you are going to create.
- Select the template type and click on save.
- After saving the template, the menu details will be displayed in the left and the template accordingly will be displayed on the right side.
- Select the paper size, orientation, margin, body layout, font family, background color.
- Click the “Is Default” checkbox to display this template in the respective pages by default. Only the template which is selected as default will be loaded in the respective pages.
- Select the report header tab, select the header logo, enter the hospital details, contact details and set up the header height, line height, select the font family, background color and font color. Click on the update button
- Click on the page header tab, in this tab the details present in the header can be edited, modified or new fields can be added. Select column size and row size, add fields, select “IS Heading” if it is a heading or click on delete icon if the field is no longer needed.
- Click on the page details tab, the default fields will be given below. These fields can be added, modified deleted and edited.
- Click on the report footer tab, select footer logo alignment, hospital details, contact details, set up the footer height, line height, font family, background color and font color.
- Create the template according to the needs and click on the save button.
- The discharge summary can be loaded from the IP Patient’s discharge list.
- The OPD slip can be loaded from the Appointment list OPD Slip icon.
- The IP admission slip can be loaded from the admission list, patient’s admission summary-> Report
- The Radiology templates can be loaded from the print icon of a particular radiology service.
3.4. Ezo Template-
Discharge Summary
OPD Slip
IP Admission form
IP Admission Slip
CT
Available template types
ADMIN
- MY SUBSCRIPTION
- Under the Account details, enter the organization details and the communication details.
- Under the billing address, check the “Same as Communication address” if the billing address is same as the communication address.
- Select the tenant logo, lab logo and pharmacy logo.
- Enter the tax settings, general settings, tenant settings and primary contact details.
- Select yes or no whether you want the SMS package or WhatsApp package.
- Click on the save button.
- My subscription- Account details
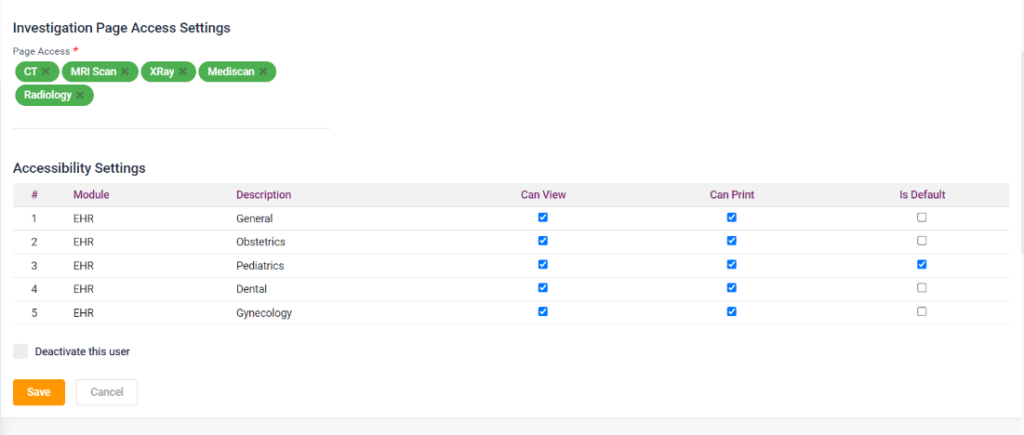
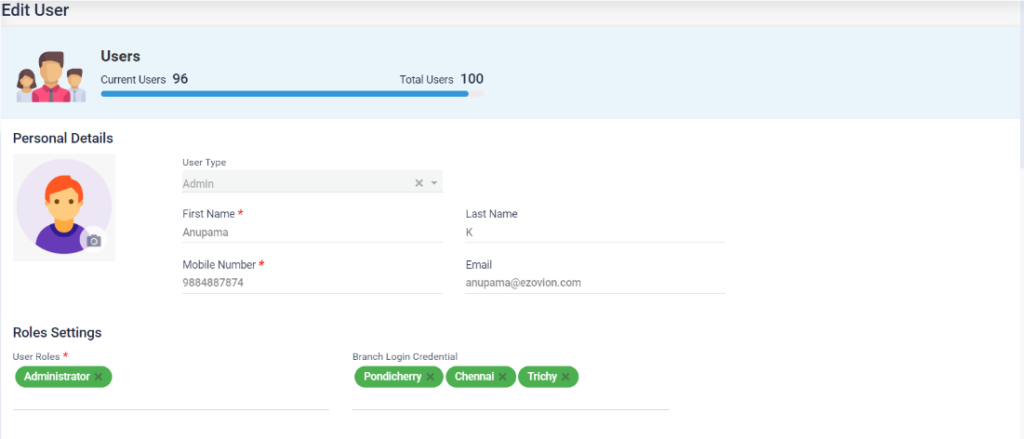
- USER MANAGEMENT
- Click on the “Add User” button.
- Select the user type and enter the user details.
- Select the user role and branch login credential.
- Select the accessibility settings of the EHR.
- Select the page access for the radiology category display.
- Enter the credential password and click on the save button.
- The settings for the users can be edited also.
- The maximum number of users which can be added will be displayed on the top.
- Settings for the users can be added individually.
- The user deactivation can be done by selecting the “Deactivate this user” check box from the edit page.
- Page routing as to which page must load after registering a patient can be set up from here by using the second edit icon of a user.
- User management- user access settings
- User Management- Page Routing
- ROLES MANAGEMENT
- Select the user role and module.
- Check the pages according to the user’s access.
- The access can be given according to their roles.
- Click on “Save” button.
- Roles Management
- TENANT BRANCH
- The tenant branch details can be seen here.
- The different branch details of the hospital can be viewed from here.
- Add Tenant Branch