Ezovion Appointment Workflow

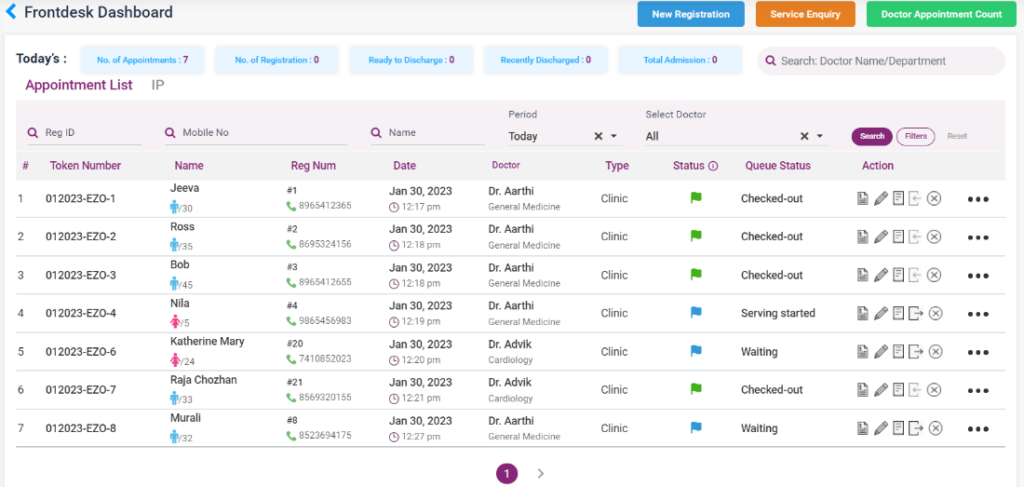
- On the new appointment page, the dashboard shows the total number of appointments, registration is done, ready to discharge, and discharged and admitted patients in the current day.
- From this page, the user can go to the “Registration page”, “Service Enquiry” page, and “Doctor Appointment Count” page.
- The list of appointments for today will be shown in a list below. The past and future appointments can be searched from the search bar.
- The listed patient’s token number can be generated by clicking the check-in icon. After check-in, the check-out icon must be clicked.
- The OPD slip for the patient can be filled in by selecting the OPD Slip icon.
- The appointment can be edited by the edit appointment icon and canceled by the cancel icon.
- To add a service for the patient, click the new bill icon, add the service, and pay the bill.
- The user can go to the patient’s appointments and add services, EHR, patient admission page, and patient bills from the action icons.
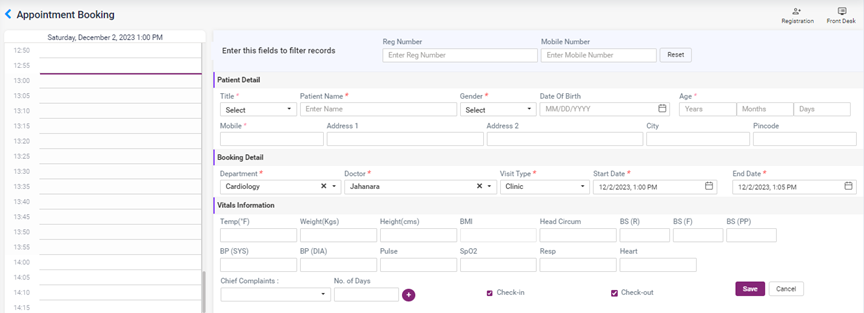
- To book an appointment for a patient, search which doctor the appointment must be booked with and click on that doctor’s name. On clicking, it directs to the “Appointment Booking” page.
- Reg Number: Enter the register number of the old patient and click on enter to load the details of that patient.
- Mobile number: Enter the mobile number of the old patient and click on enter to load the details of that patient. If family members have the same mobile number, the list of members will be shown in the patient list drop-down box. Select the patient and click enter to load the details.
- Patient Details: To register a new patient, enter the details of the patient in the patient details section, title, name, DOB, mobile number, address, city, and pin code.
- Booking details: The selected doctor’s name and department, visit type, start date, and end date will be loaded. Users can select the details from here if they want to change them.
- Vitals Information: The vitals details of the patient can be entered here.
- Chief Complaints: Enter the complaint of the patient and select the days. Select the check-in, check-out check box if you want to check in or check out the patient.
- Click on the save button, which directs you to the page selected in the routing page in user management.
4.2.1 Appointment page
4.2.2. Appointment booking page