To book an OT appointment, admit the patient, then under IP-> Admission List. The patient’s name will be loaded. Click on the action icon and select the “OT Booking” option.
- Upon clicking, it will direct you to the “OT Booking” page. On that page, click the “Add Booking” button to load the “Add OT Booking” page.
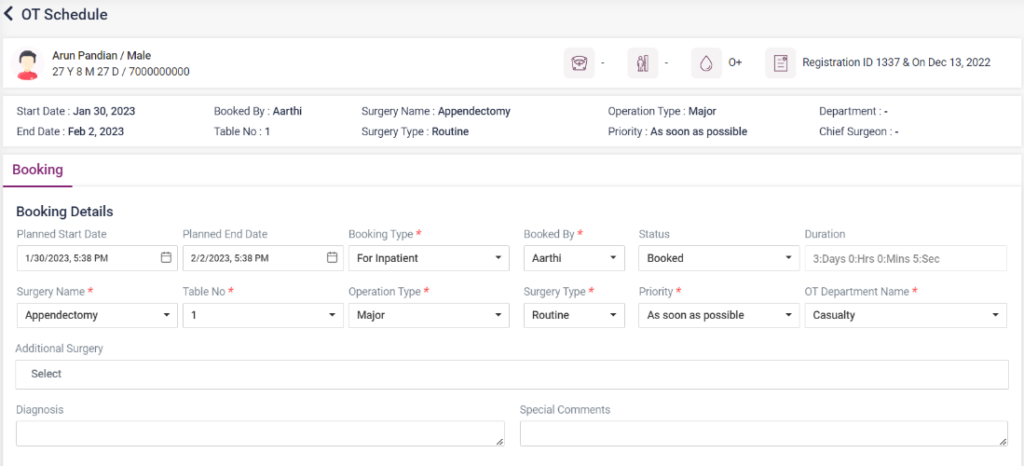
- OT Schedule details- Start Date and End Date: Select the Start date and end date.
- Booking type: Select the booking type, whether Inpatient or Daycare.
- Booked By: Select the name of the employee booking the OT.
- Status: On first-time Booking, select “Booking” as status.
- Duration: Duration will be calculated automatically and displayed.
- Booking Details- Select the surgery name, table no, operation type, surgery type, priority and Internal incharge department. The fields mentioned above are mandatory.
- Enter the additional surgery, diagnosis and special comments if needed.
- Save: Click on the save button to book the OT.
- Cancel and Reset: Select cancel to cancel the OT Booking and reset to clear the entered details.
- After that, the Booking list will be updated and directed to the Patient OT Summary page.
- From there, the user can go to the OT Schedule page by clicking the action icon or from Operation Theatre-> OT List-> search for current day booked OT and select the action icon.
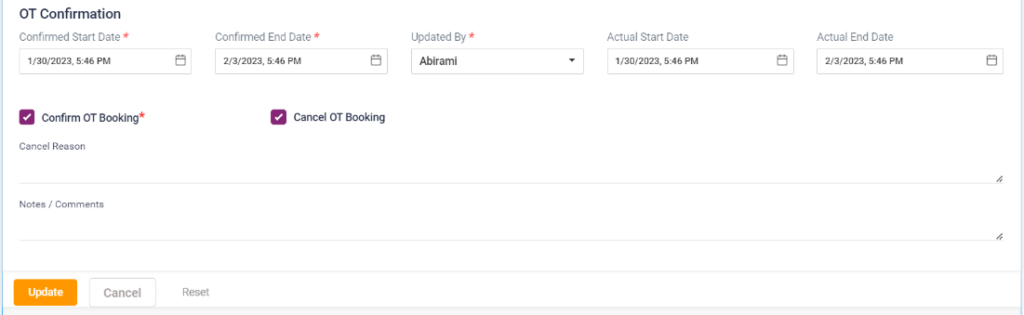
- From there OT Schedule page will be loaded. The booking details will be loaded automatically. The user has to confirm the Booking by selecting the confirmed dates and the user name and clicking on the “Save” button to schedule the OT booking. Once completed, the status will be changed to “scheduled”.
12.1.1 OT List page

12.1.2 OT Booking page

12.1.3 Patient OT Summary
- Click the action icon, which loads the OT Schedule page with the following sections,
- Booking:
- This is the OT Schedule page with already loaded information which has been filled up.
- If the OT has been cancelled, select the cancel OT booking checkbox, enter the reason and select the “Update” button.
- If not, continue with the below-given details.
112.1.4 OT Schedule- Booking
12.1.5 OT Schedule- OT Confirmation

12.1.6 OT Schedule- OT Cancellation
- Surgery Team:
- Physician: Click the Add physician button, select the key role, physician name, and department, select any discount if needed and select the “Save” button. Chief Surgeon alone can be selected once. The details added can be edited or deleted.
- Employee: Click the Add Employee button, select the key role, physician name, and department, select any discount if needed and select the “Save” button. The details added can be edited or deleted.
- Check List: Click the Add Checklist button, and select the checklist name and the employee’s name who has confirmed it. The details added can be edited or deleted.
12.1.7 OT Schedule – Surgery Team

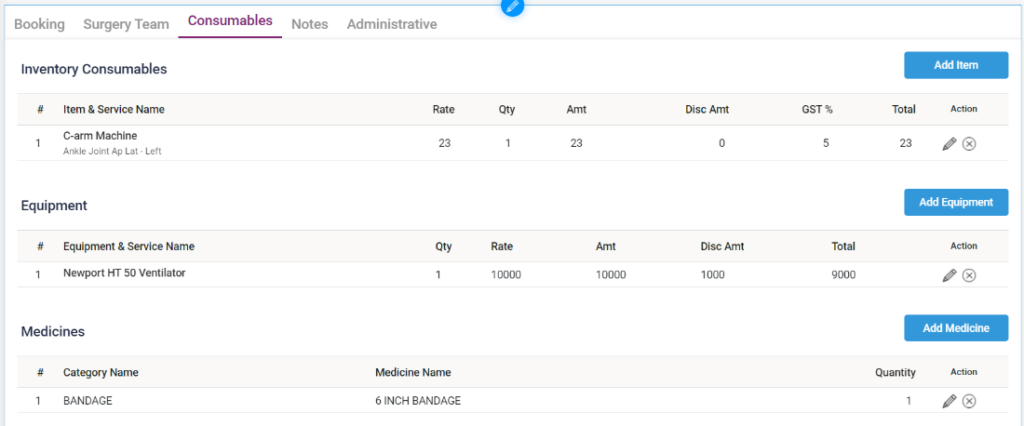
- Consumables:
- Inventory Consumables: Click on the “Add Item” button and select the items needed for the OT surgery.
- Equipment: Click on the “Add Equipment” button, select the equipment used in the OT, and save it.
- Medicines: Click the “Add Medicine” button, select the medicine category, medicine name, and quantity and click on the “Save” button.
12.1.8 OT Schedule – Consumables
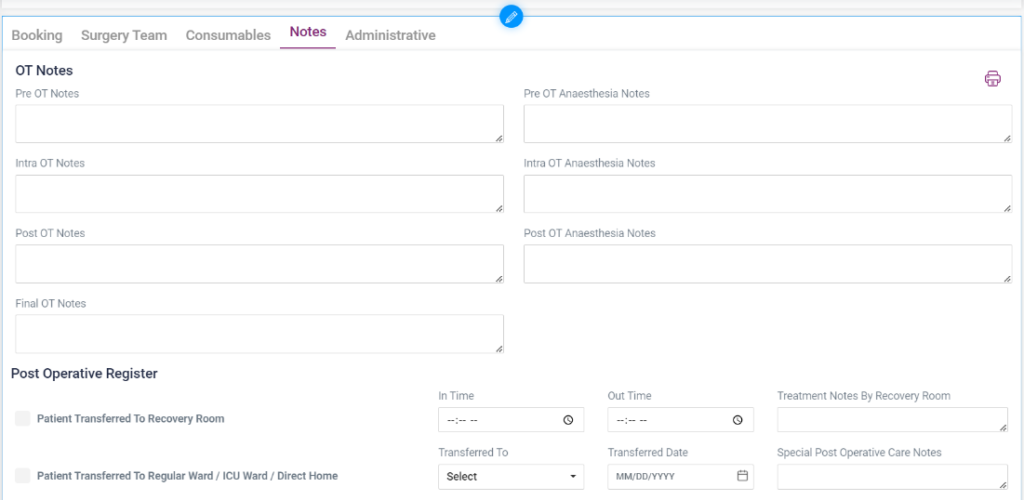
- Notes:
- OT Notes: Enter the following notes if needed. Pre OT Notes, Pre OT Anesthesia Notes, Intra OT Notes, Intra OT Anesthesia Notes, Post OT Notes, Post OT Anesthesia Notes, Final OT Notes.
- Post Operative Register:
- Patient transferred to recovery room: enter the In time, out time, and treatment notes by a recovery room.
- Patient Transferred to Regular Ward/ ICU Ward/ Direct Home: Select the Transferred to, transferred date, and special post-operative care notes.
12.1.9 OT Schedule – Notes
- Administrative:
- Surgery Team: Click “Send to Billing” to send the surgery team details to the patient’s IP billing section.
- Employee/Technician team: Click “Send to Billing” to send the employee team details to the patient’s IP billing section.
- Consumables Charges: Click “Send to Billing” to send the consumables details to the patient’s IP billing section.
- Equipment and Usage Charges: Click “Send to Billing” to send the equipment details to the patient’s IP billing section.
- Medicine Charges: Click “Send to Billing” to send the medicine details to the pending bill section of the sales dashboard under sales in the Pharmacy module.
12.1.10 OT Schedule – Administrative
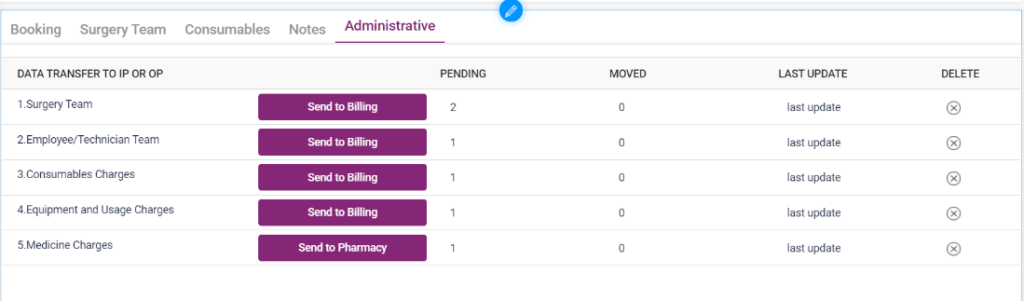
Once the details are sent, the count will be updated from pending to moved column.
Once all the steps mentioned above are completed, the physician consultation details, the employees involved in the OT, surgery fee details, the equipment used, and the medicines needed, all of these details will be sent to the IP Billing section of the IP Admission List. The billing should be done from there, and the OT must be updated as Completed.
12.1.11 – IP Service – Sent To Billing