The USER has to fill up the patient’s details in the Personal Details form by clicking on ‘New Registration’ from the ‘Registration’ Module in the menu.
- The page will be redirected to the ‘Personal Details Form’ page
- The Patient Details form contains the following sub-modules to be filled
1. Basic Details
2. Contact Details
3. Referral Details
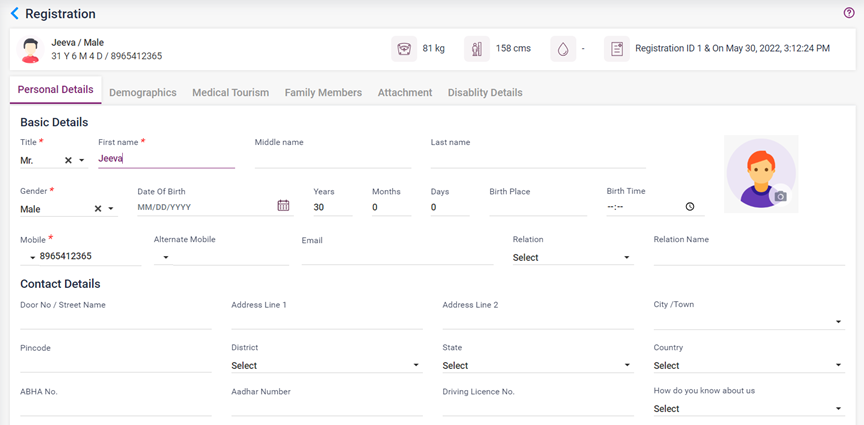
- Basic Details (Fields with asterisk * are mandatory)
- Profile Picture-Upon Clicking allows the user to upload the picture of the patient via taking a picture or uploading a picture from the Device.
- Title * – Select a title from the drop-down list shown.
- First name * – Enter the First Name of the patient.
- Middle Name -Enter the First Name of the patient.
- Last Name – Enter the Last Name of the patient.
- Gender * – Select the gender of the patient from the drop-down list shown.
- Date of Birth – Select the DOB of the patient from the calendar, which pops up upon clicking the field.
- Years/Month/Age – Enter the age of the patient years, month, and day-wise.
- Birthplace /Birth Time– Enter the Birthplace and Birth Time (For newborn babies if needed)
- Mobile * – Enter the mobile number of the patient.
- Email Address– Enter the email address of the patient.
- Alternate Mobile– Enter the alternate mobile number of the patient if needed.
- Relation– Select any one of the C/o from the drop-down list.
- Relation Name– Enter the Name of the selected C/o given in the previous field.
- Contact Details
- Door No/Street Name– Enter the house no and street name of the patient’s Residential address.
- Address 1– Enter the address of the patient.
- Address 2– Enter the second line of the address of the patient.
- City– Enter the City name of the patient’s residential address.
- Pin code-Enter the Pin code of the city.
- Select District- Select the district of the patient’s city from the drop-down list.
- Select State– Upon selecting the city, State gets automatically updated.
- Select Country– Upon selecting the city, the Country gets automatically updated.
- Email– Enter the email address of the patient.
- Ayushman Bharat Health Code– Enter the Ayushman Bharat Health Code of the patient if needed.
- Aadhar Number– Enter the Aadhar number of the patient
- Driving License Number– Enter the license number of the patient.
- How do you know about us? – Select any one of the options available if required
- Referral Details
- Select Referral – Select any options available in the drop-down list.
- Selecting the Referral type will show the respective field to select the Name of the Referral.
- Select the name of the referral from the displayed list.
After entering the details as mentioned above, the following buttons will be available to continue,
- Save
- Save and Continue
- Save and Make an Appointment
- Cancel
- Reset
- Save Button – Upon clicking the “Save” button, the patient’s details entered in the current page will be saved in the Ezovion HMS and redirected to the Ezovion HMS home page.
- Save and Continue Button – Upon clicking this button, the details of the patients will be saved in the Ezovion HMS and moved to the next tab, “Demographics.”
- Save and Make Appointment Button – Upon clicking this button, the details of the patients will be saved in the Ezovion HMS and redirected to the “Appointment” page.
- Cancel Button– Upon clicking cancel, it redirects to the Ezovion HMS home page.
- Reset Button– Upon clicking Reset, the details entered will be cleared, and a new page will be displayed.
3.1. Registration page (Personal Details- Basic Details and Contact Details)
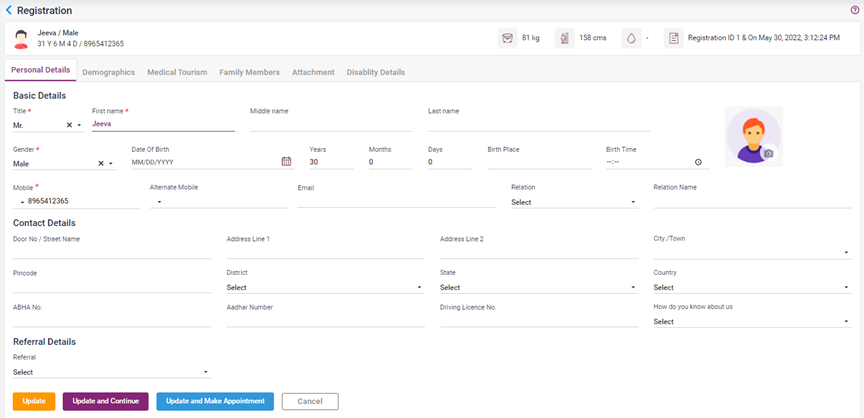
3.2. Registration page (Personal Details –Referral Details)
